Kale, Red Onion, and Sweet Potato Pizza & 30 Days of Yoga.

OLYMPUS DIGITAL CAMERA

Day 1: Wow… getting on that mat can be really hard work, right? I know. I really, truly, do. And when it’s been weeks, or months, or maybe years for some, your body aches, and burns, and hollers for you to stop. Sometimes we do stop. We do this either by physically stopping or mentally drifting off to the beach, the grocery list, the last episode of Game of Thrones, or the piece of quinoa in the floor board, ahem. It’s hard to be in our bodies. It means being fully conscious of what is happening in the now, in this very moment – whether it is sadness, pain, pleasure, fear, or ecstasy. Truth be told, this can be very uncomfortable. But, if we stay with it, if we bring our breath back to consciousness and back to this very moment, we see that nothing lasts – not even the pain.

It’s day 1 of our 30 Days of Yoga and I want to be really honest here. I vacuumed the whole freaking house, cleaned the bathroom, and did some video editing before I finally settled onto my mat. I can sit here and tell you that doing yoga in a clean house is important to me, but let’s be honest, it’s an excuse. It’s all an excuse for not just getting down to business and seeing where your body and mind are at. While it wasn’t easy, it was absolutely magical. I realized my body ached because I haven’t been on my mat. My discipline and devotion to my practice have been lacking to say the least. It’s hard being a mamma – but there again is another excuse. When I really think about what I do with my time, there is ALWAYS 30 minutes somewhere to do this work. So let’s all bring our fullest selves to our mats today, tomorrow, and for the next 29 days (and then some).

OLYMPUS DIGITAL CAMERA

OLYMPUS DIGITAL CAMERA

OLYMPUS DIGITAL CAMERA

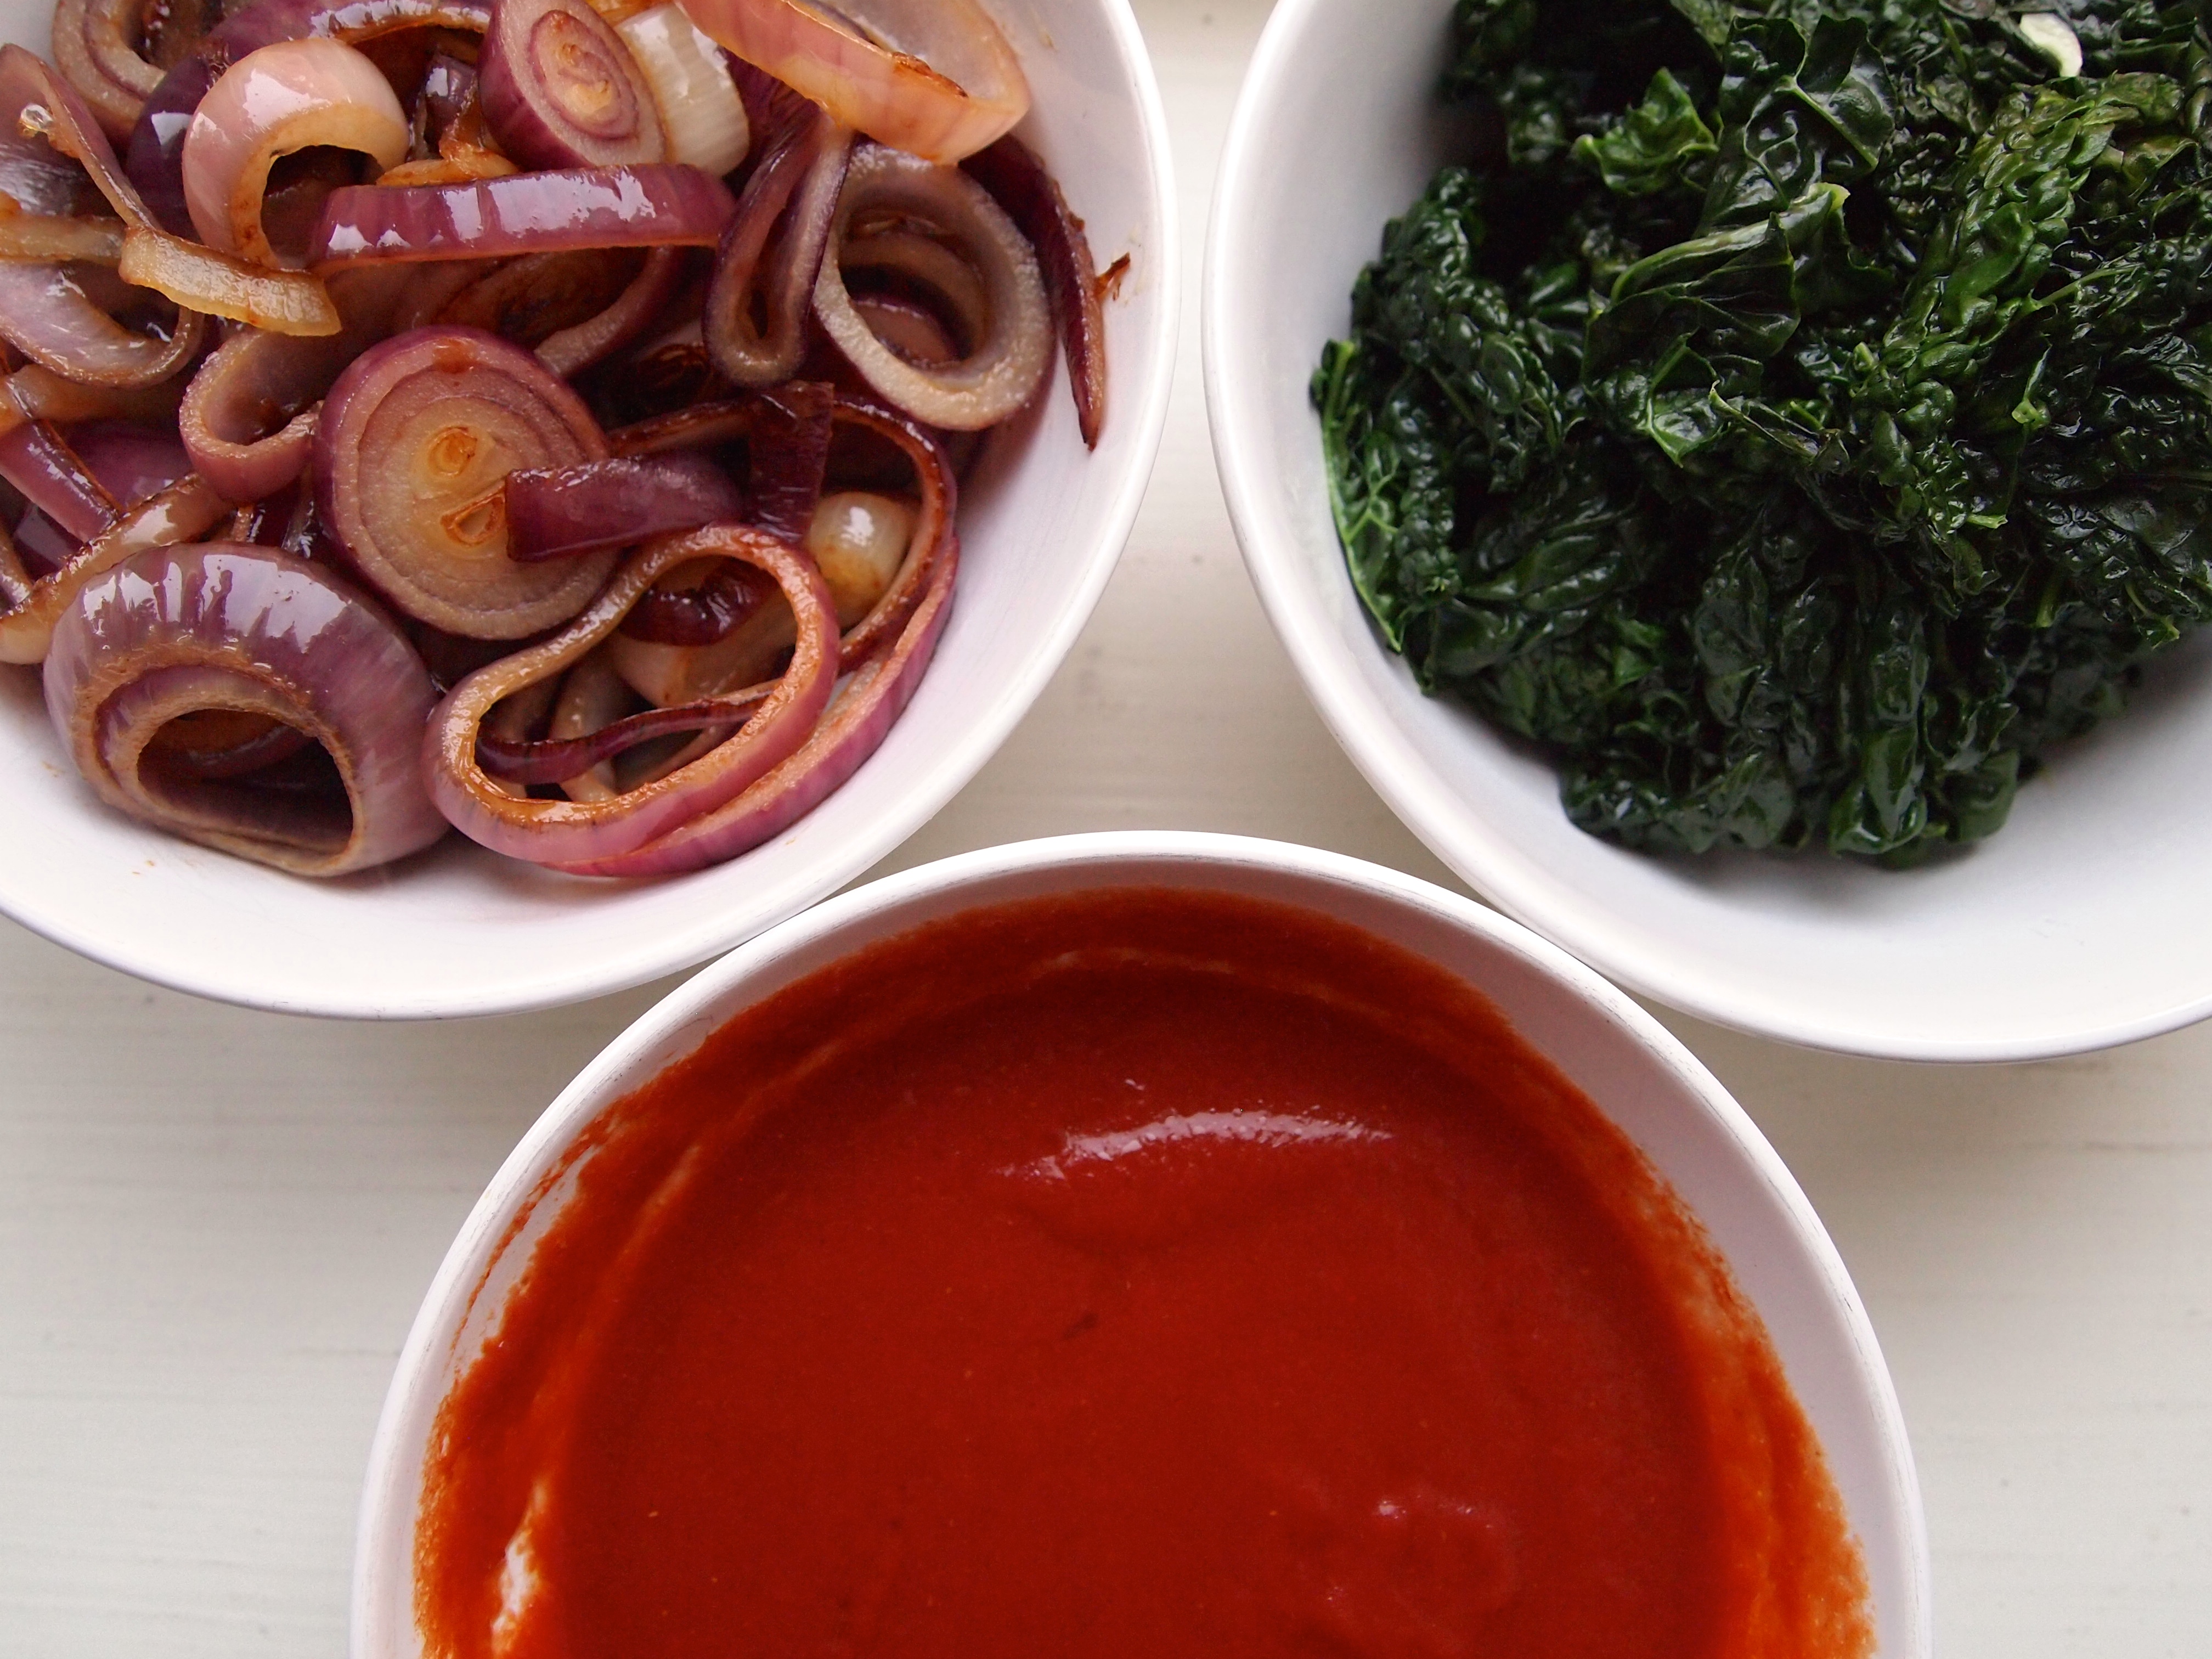
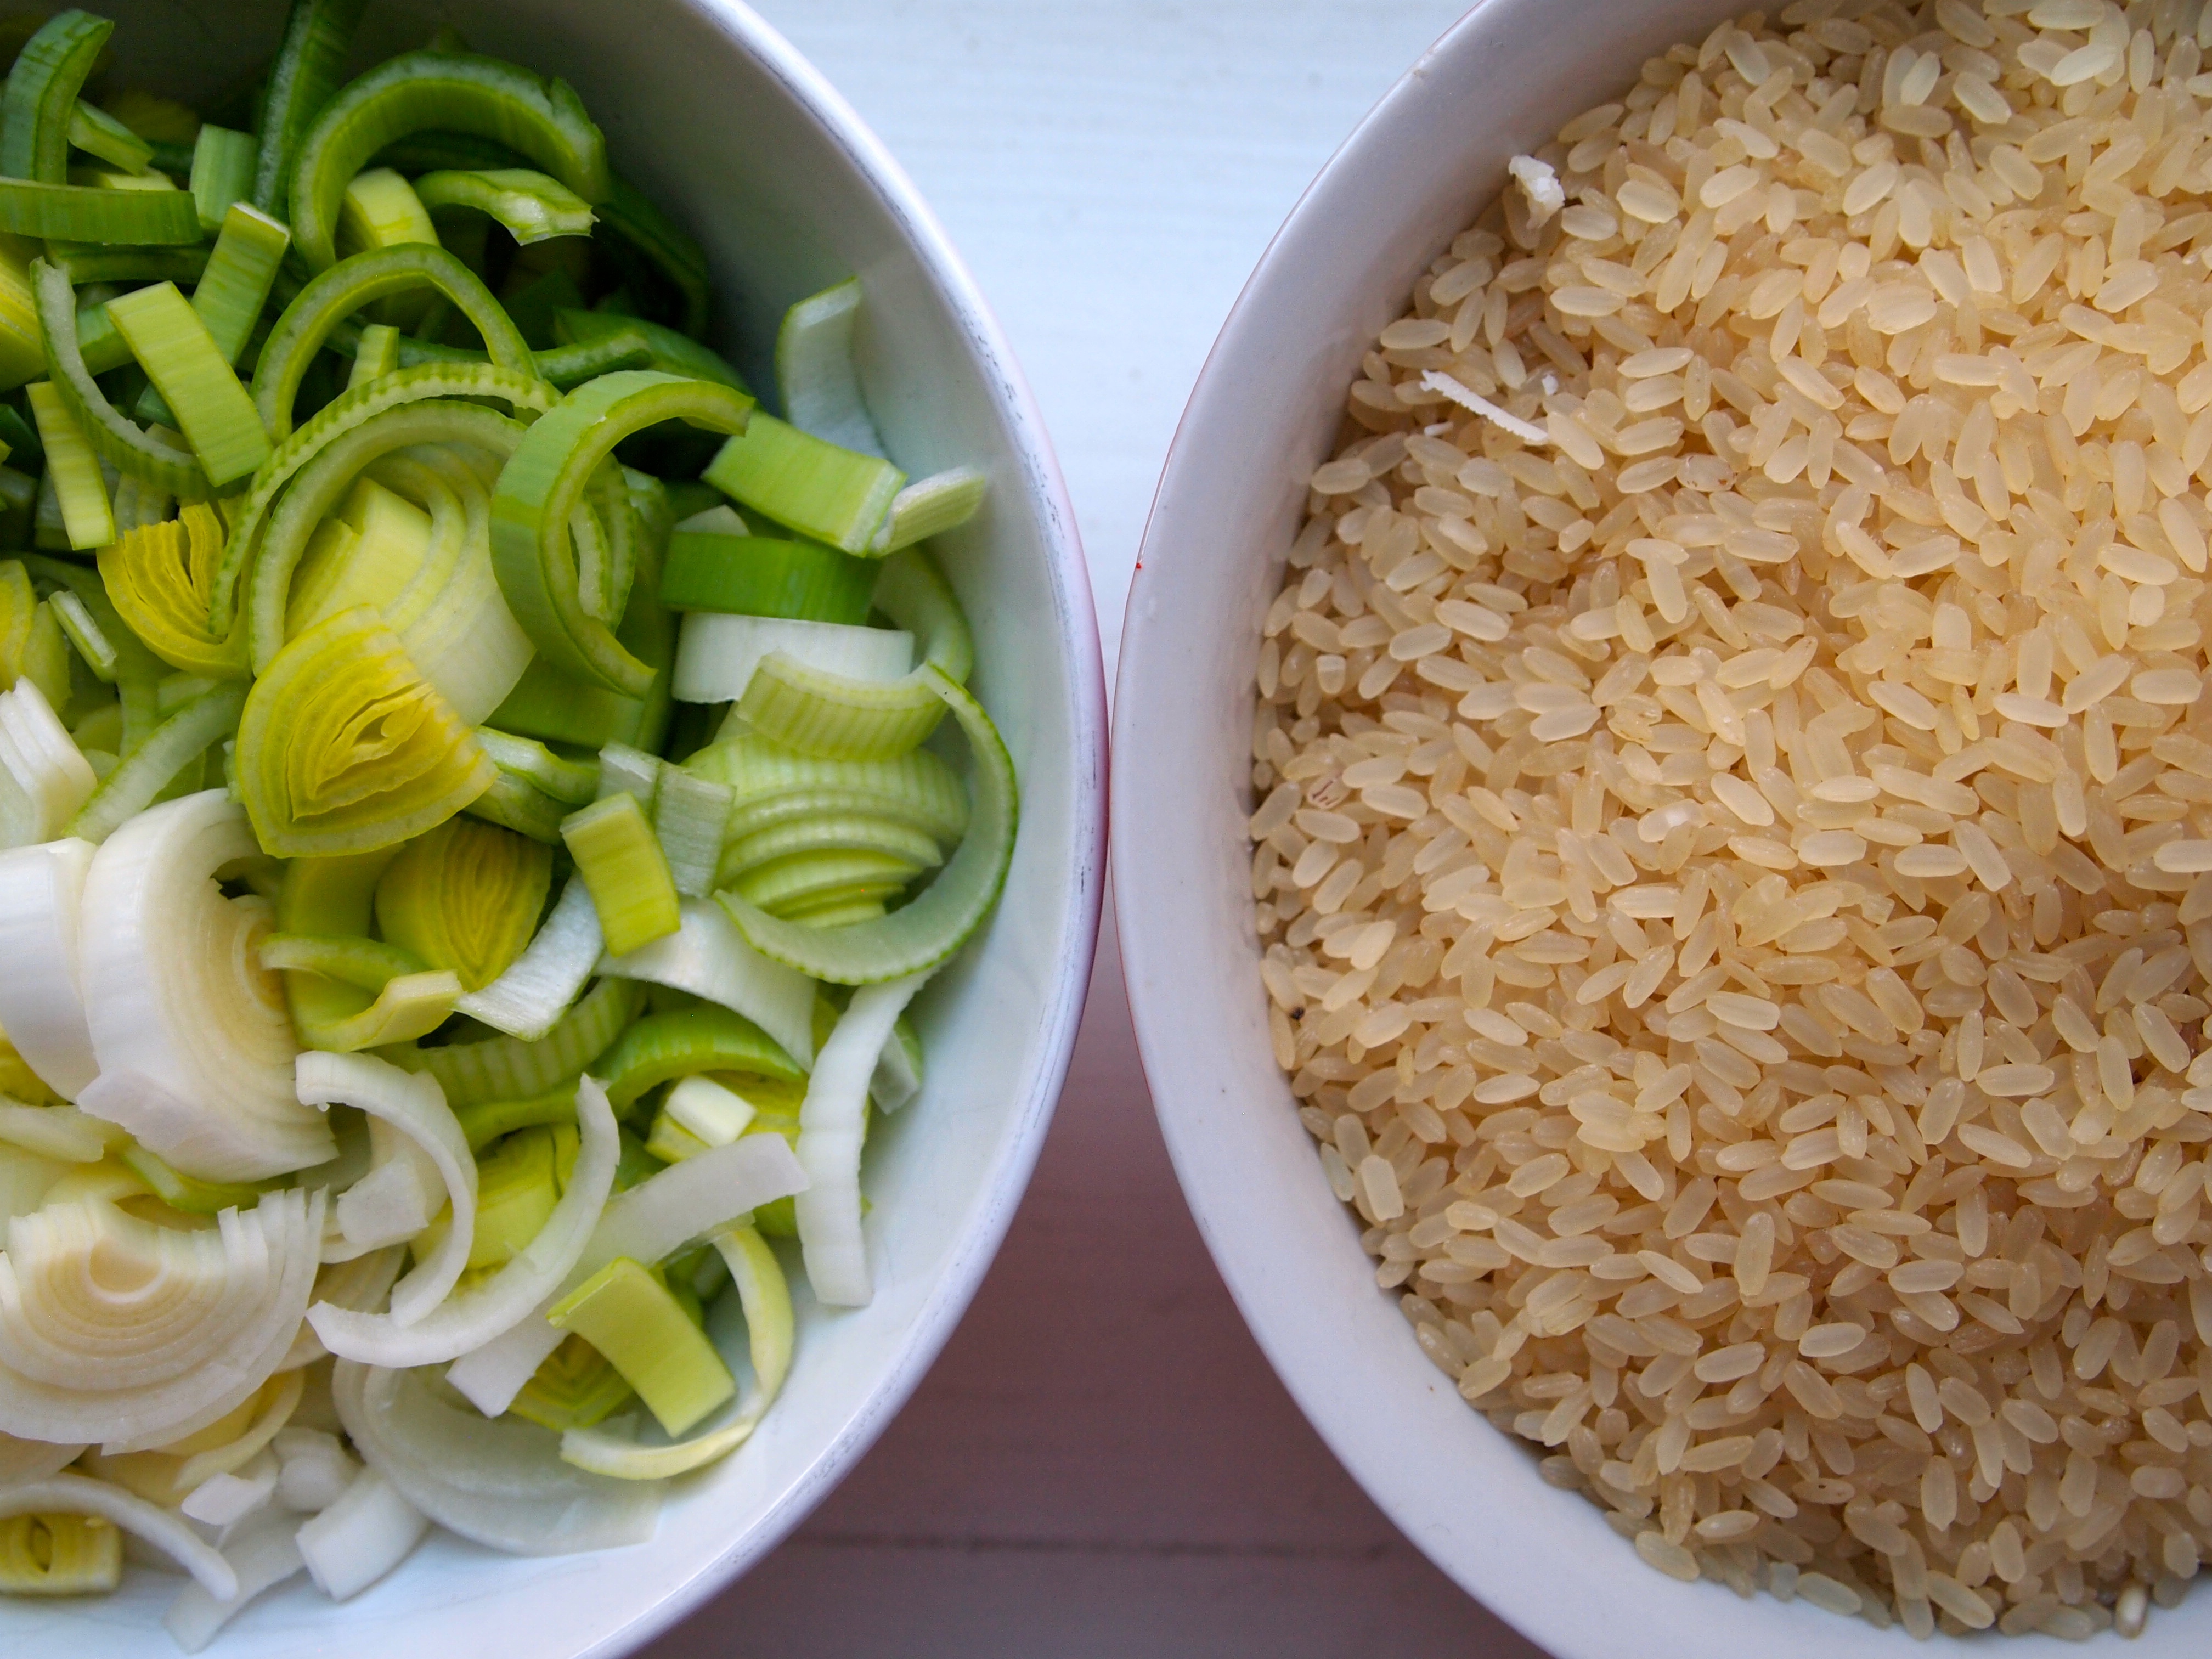
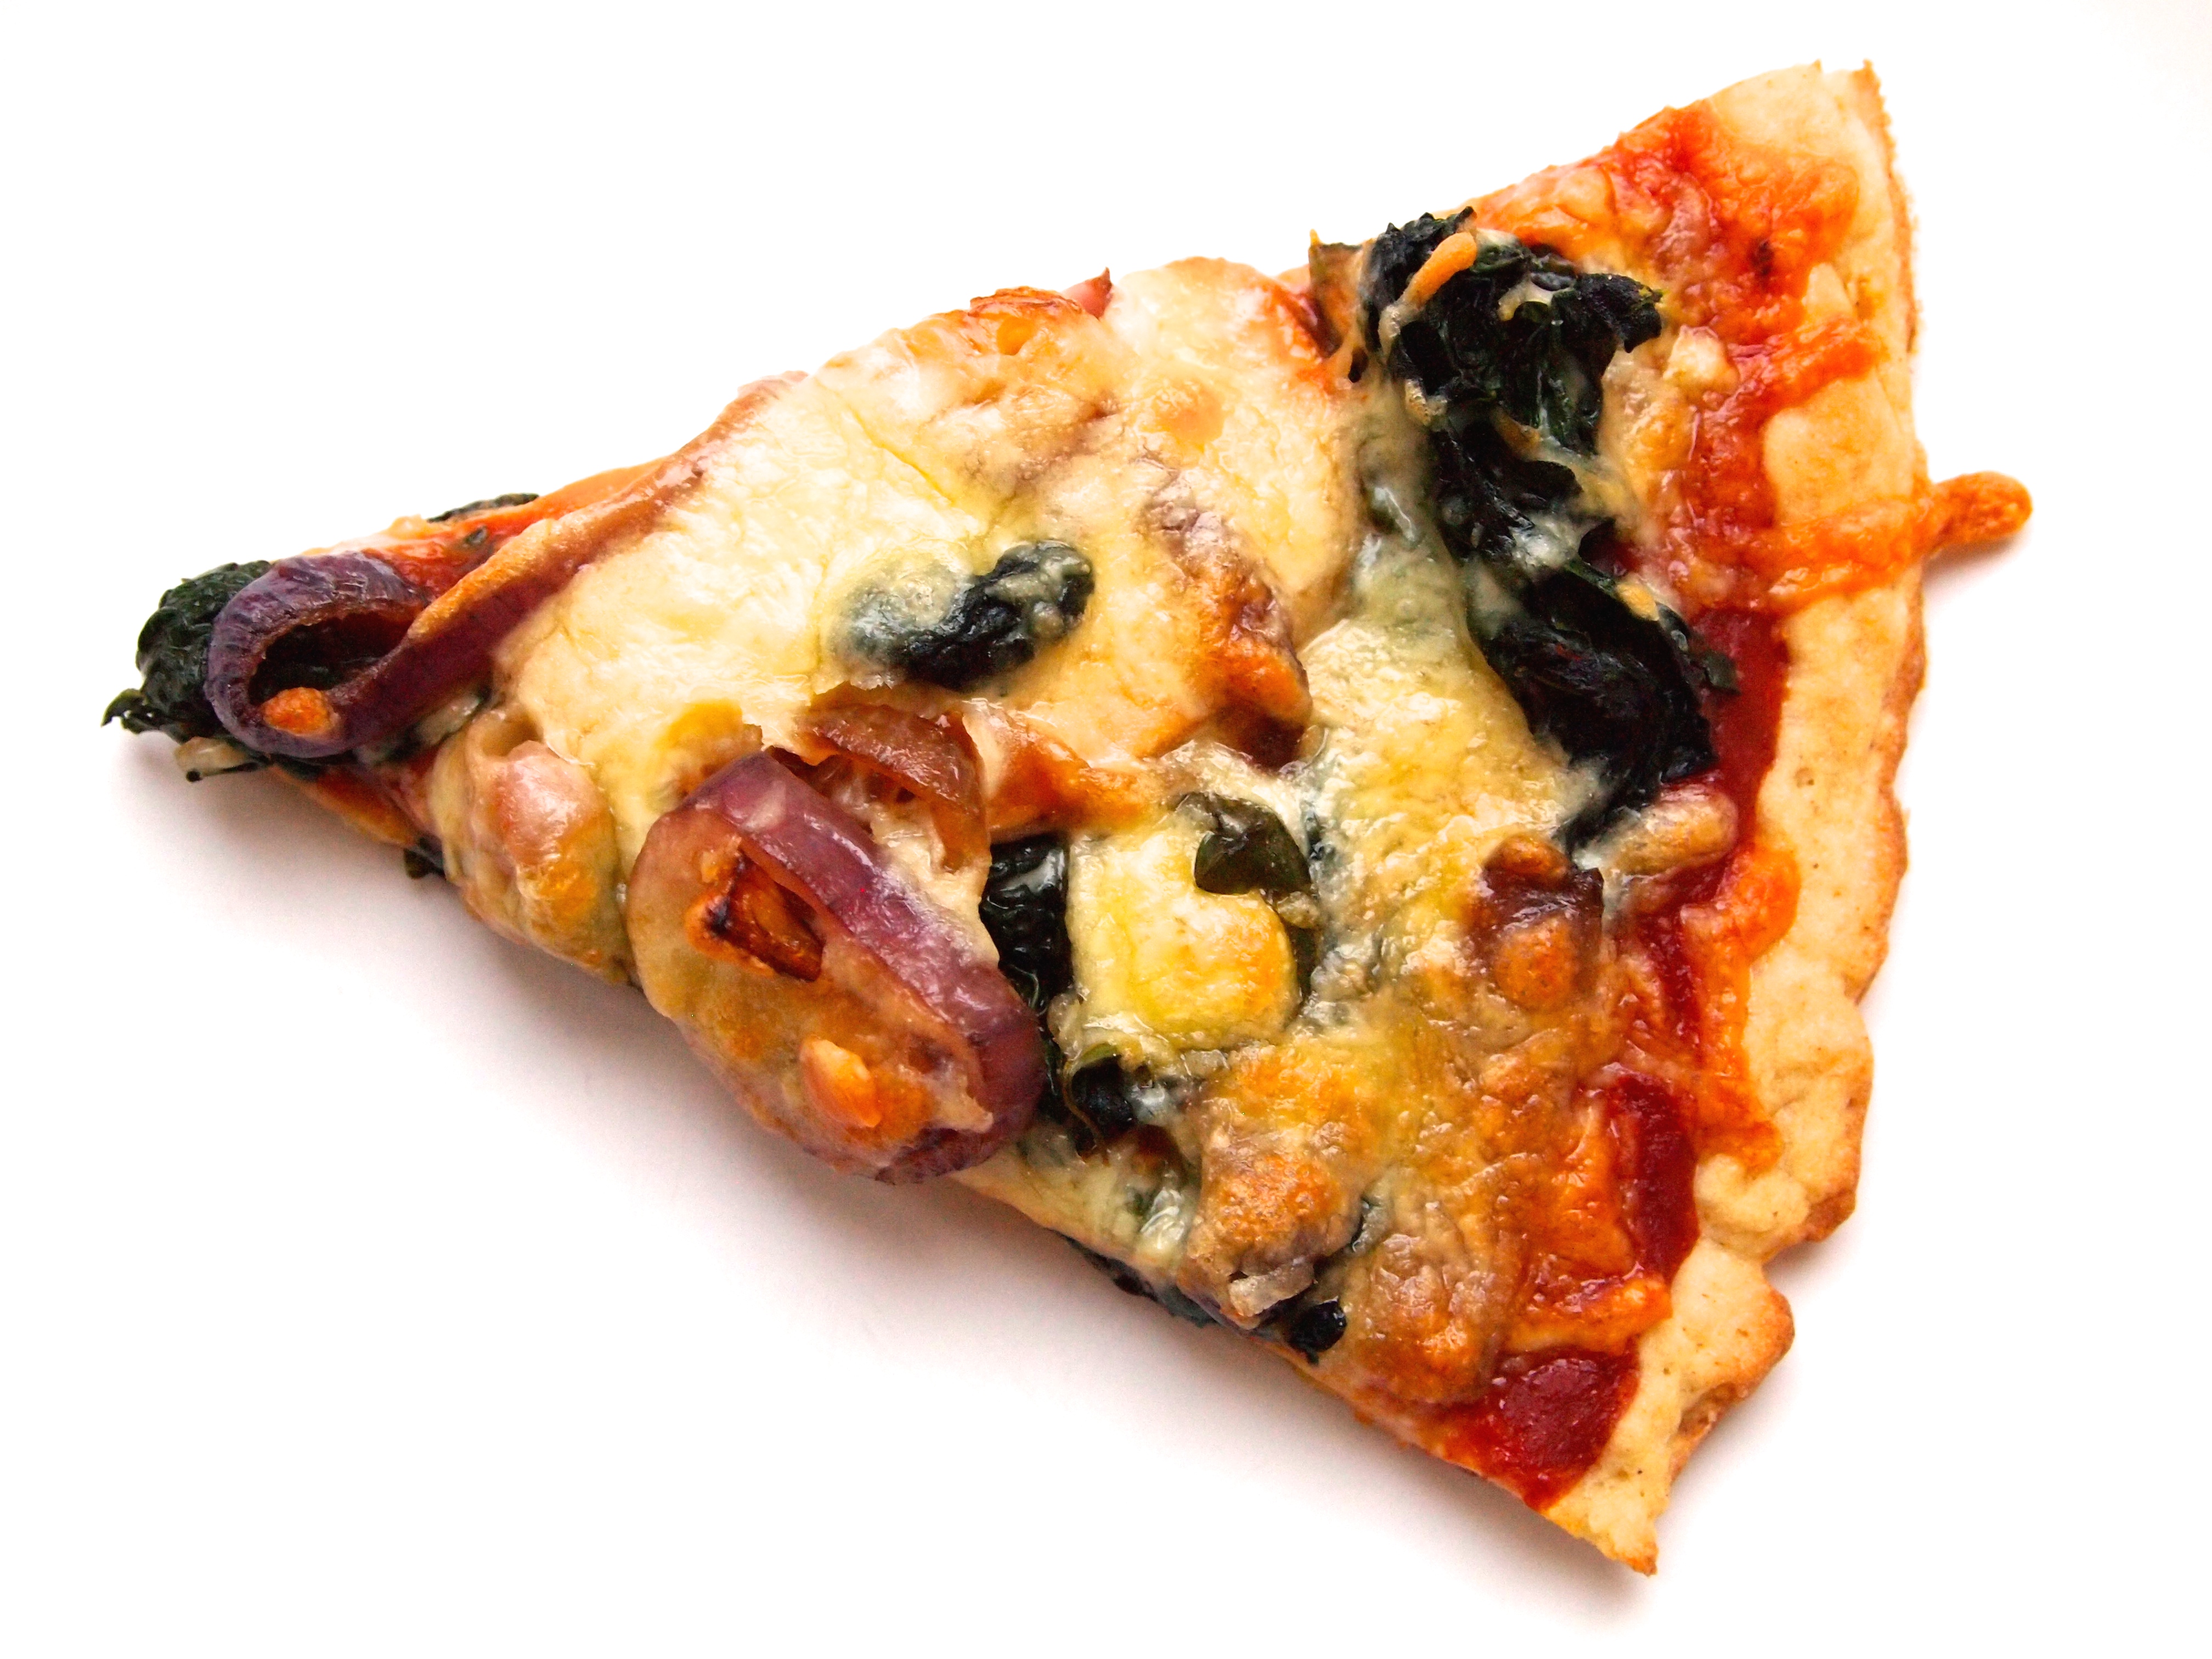
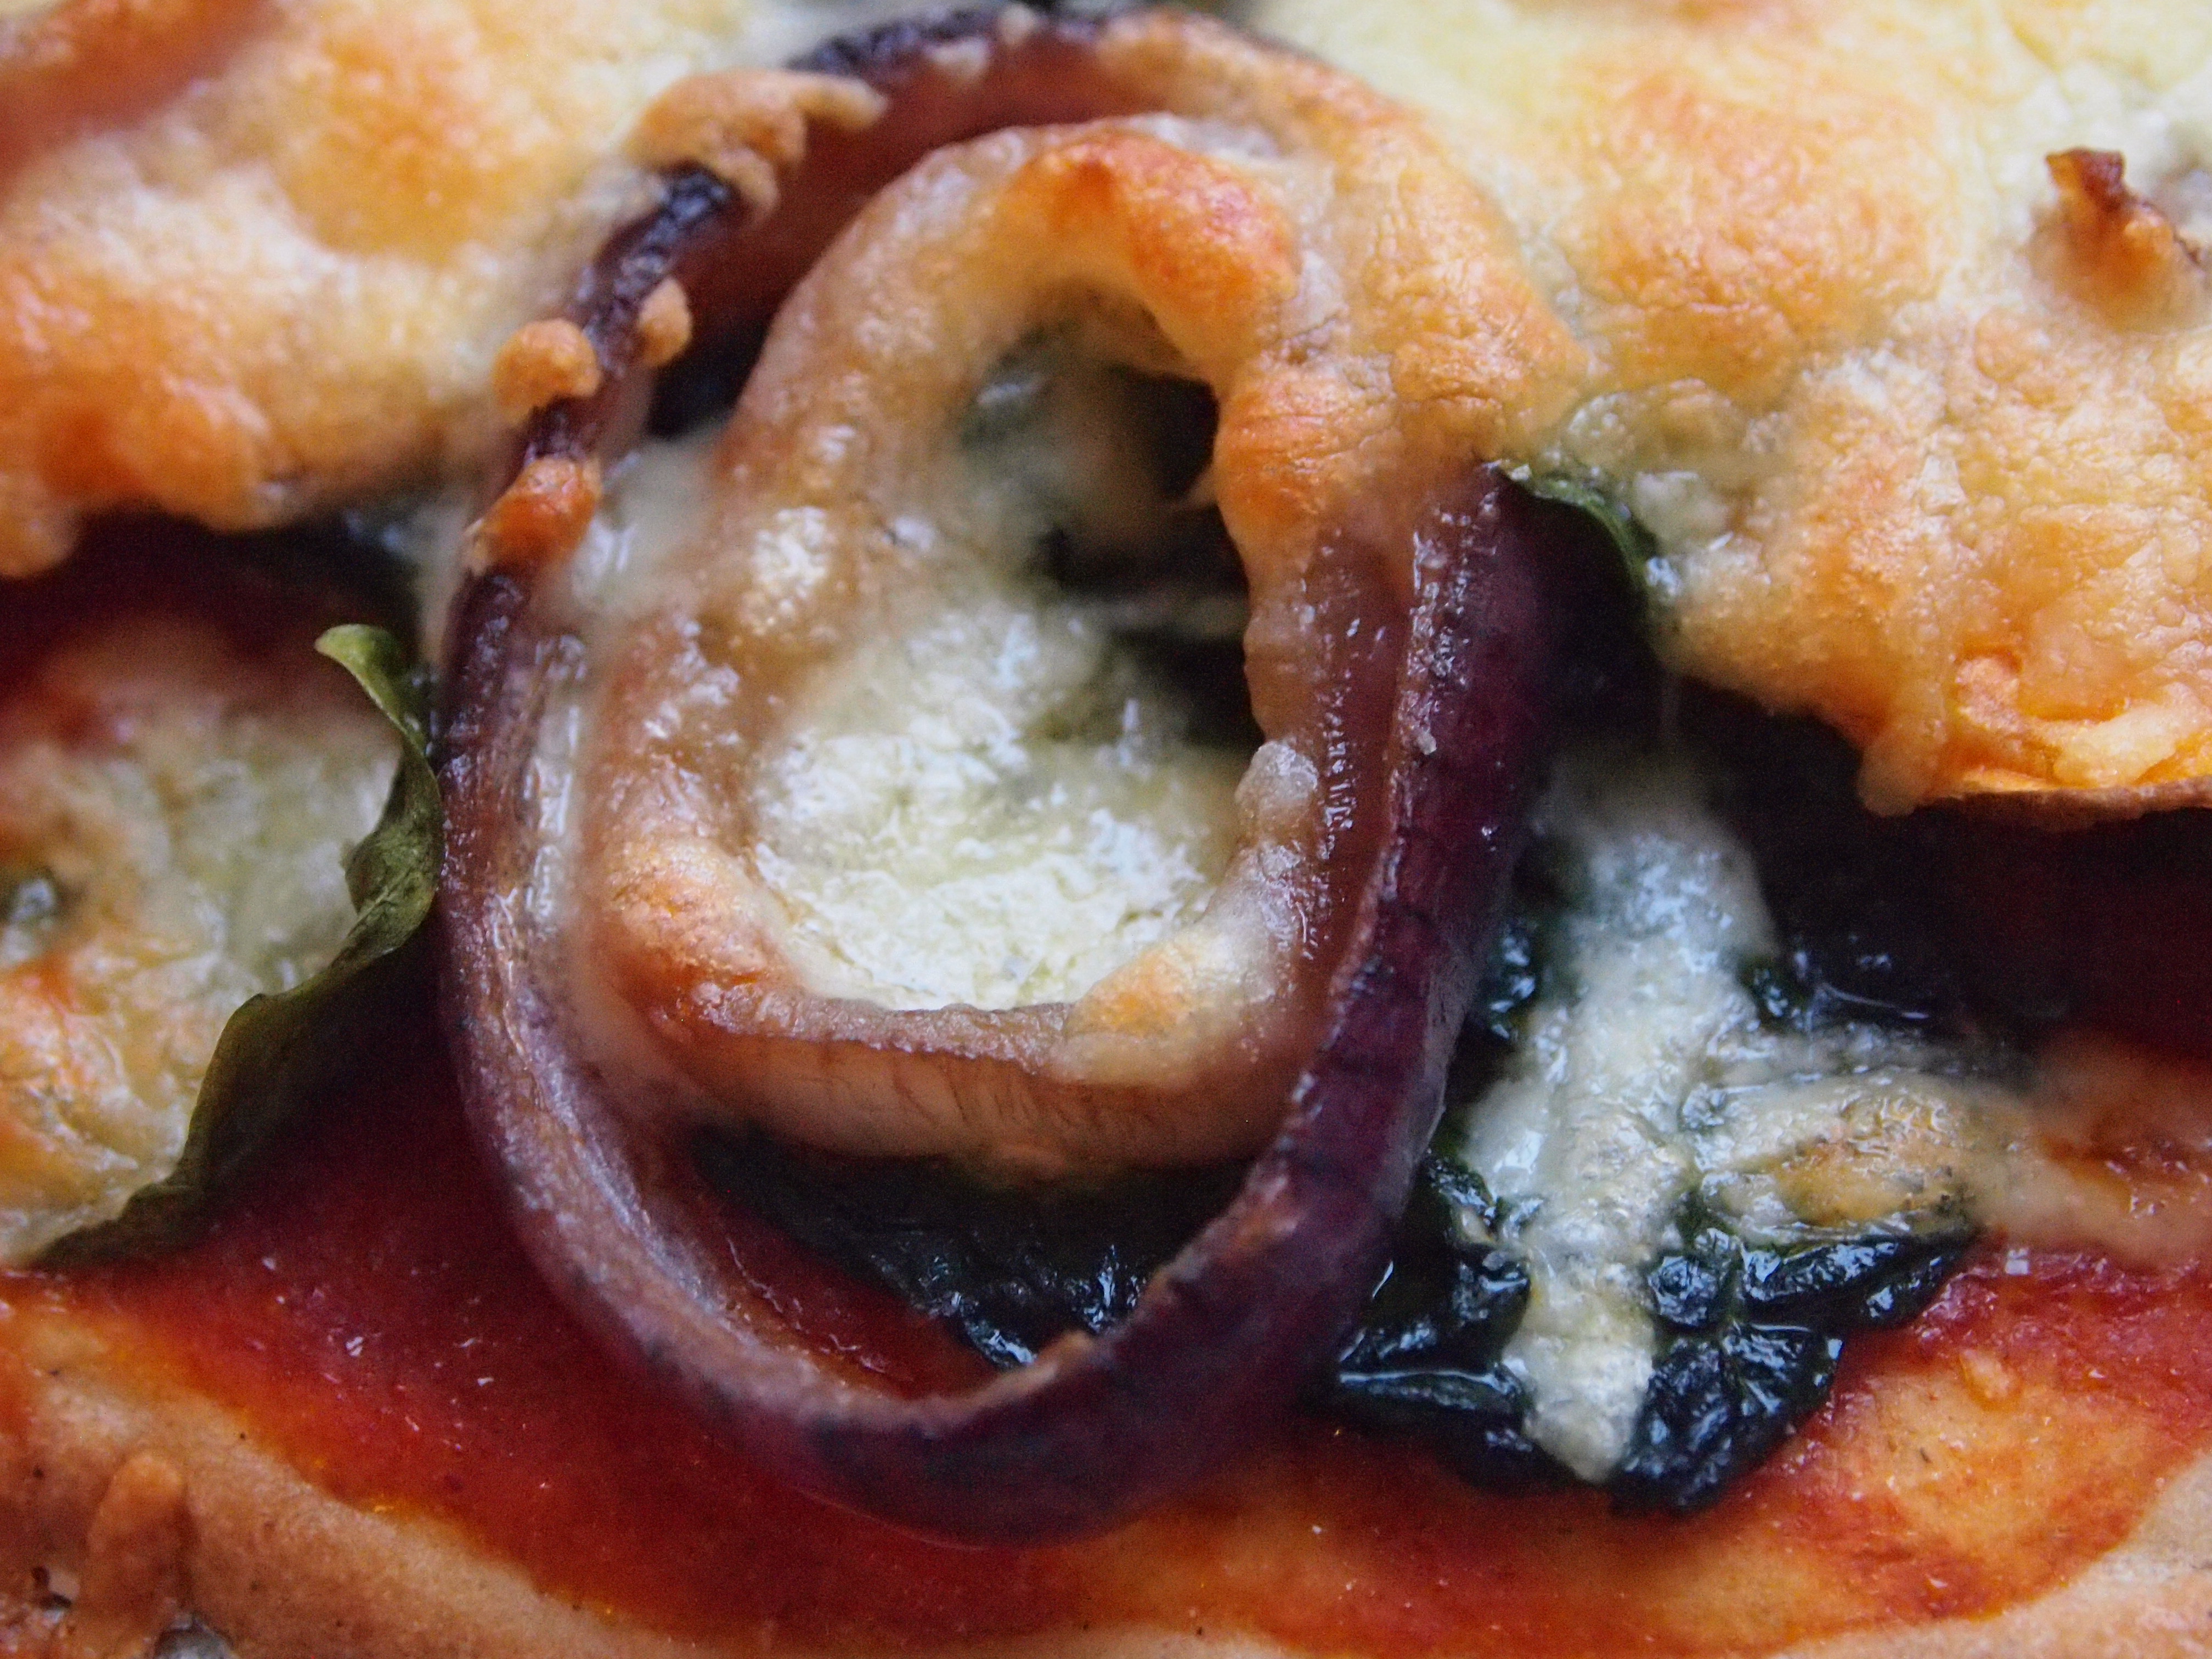
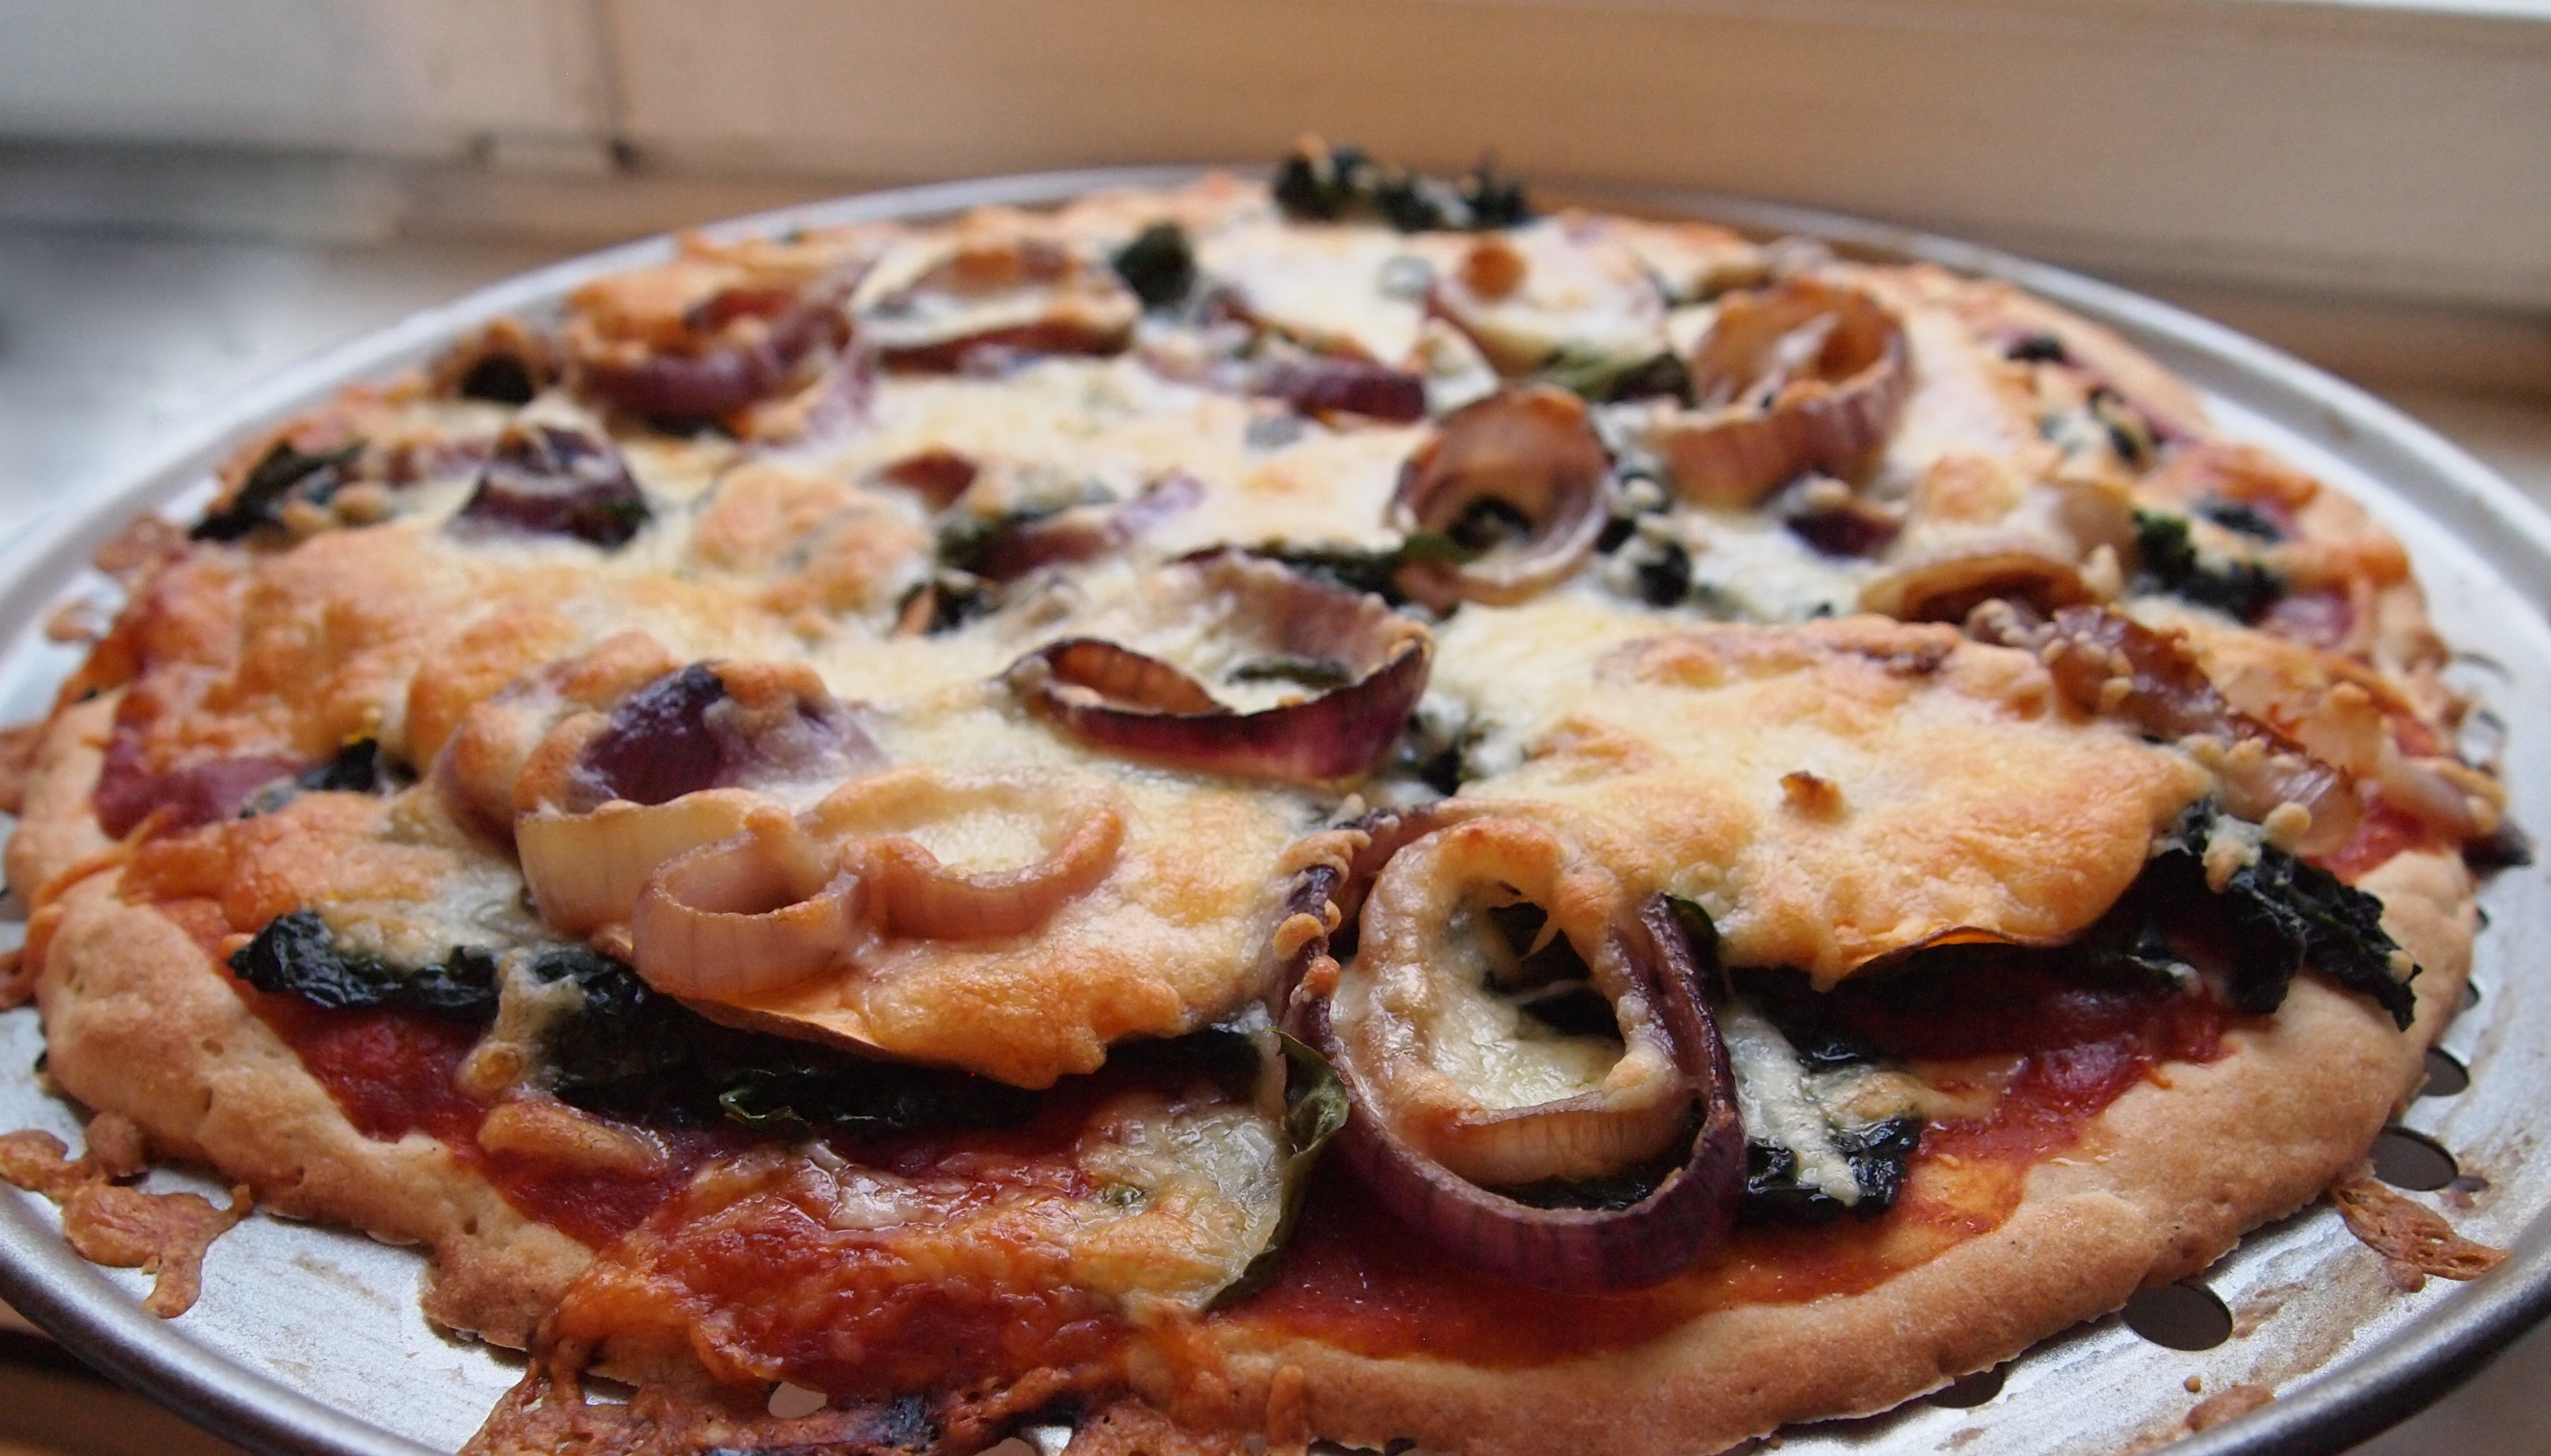
Now, I’m not going to leave you hanging without a nice little recipe for dinner. Now that you’ve spent your 30 minutes doing yoga, you probably didn’t have time to brainstorm a healthy dinner, wink wink. I’ve got your covered. This pizza is the mac daddy of comfort food meets kick-ass, nutrient rich, power-veggie-supreme. Yeah, it’s got cheese (I already told you about my weaknesses!), but you can absolutely use vegan cheese too. It starts with a gluten free whole grain crust (I like this one), then a layer of a simple tomato sauce, then sautéed red onions, sauté-steamed garlic kale, paper-thin sweet potato slices and cheese. Throw some fresh basil on top and let the flavors take you to pizza paradise.

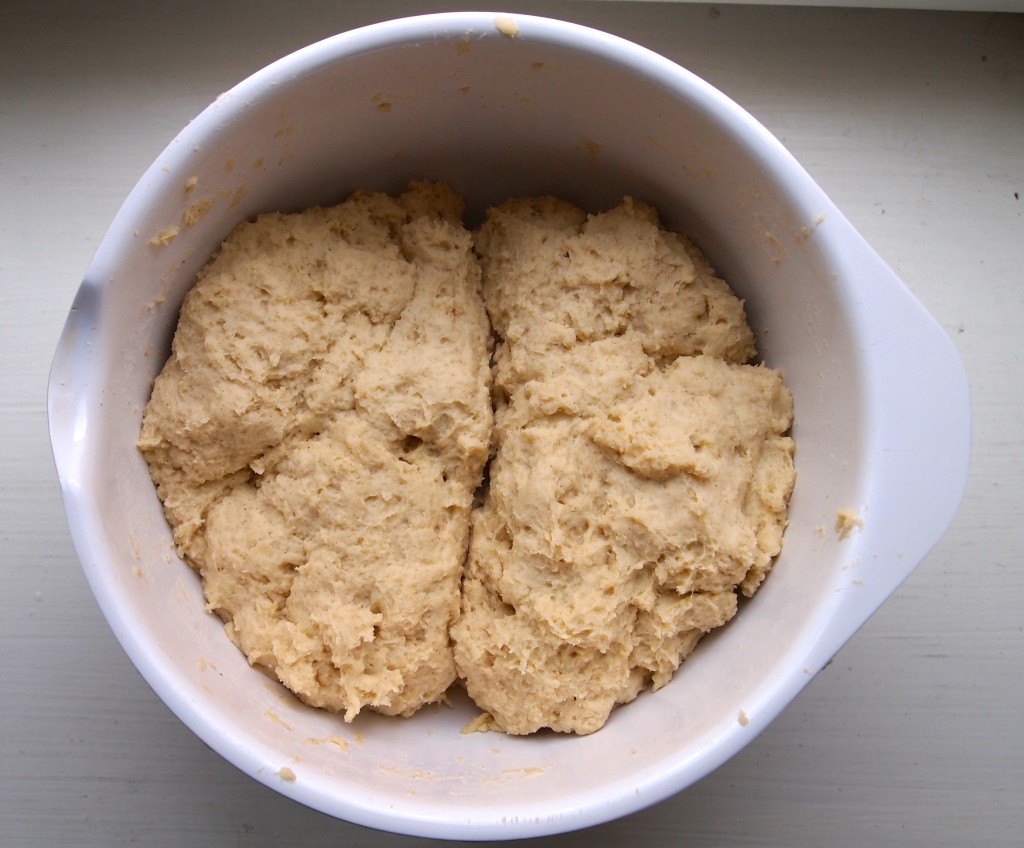
This is a simple and healthy dish that anyone will love – even the non-believers. This crust does take a bit of time to rise and pre-bake, so that’s something to keep in mind. If I’m busy I like to do the onions and kale and prep the sweet potato earlier in the day. The other little secret to this pizza is that it’s baked on a pizza pan. We bought one that is round and has holes, but there are a million types out there. It really does make a difference, for realz.

OLYMPUS DIGITAL CAMERA

OLYMPUS DIGITAL CAMERA

OLYMPUS DIGITAL CAMERA

Kale, Red Onion, and Sweet Potato Pizza: 

Ingredients:

  • 1 gluten free pizza crust
  • 1-2 cups tomato sauce (depending on how many pizzas you make – we made 2)
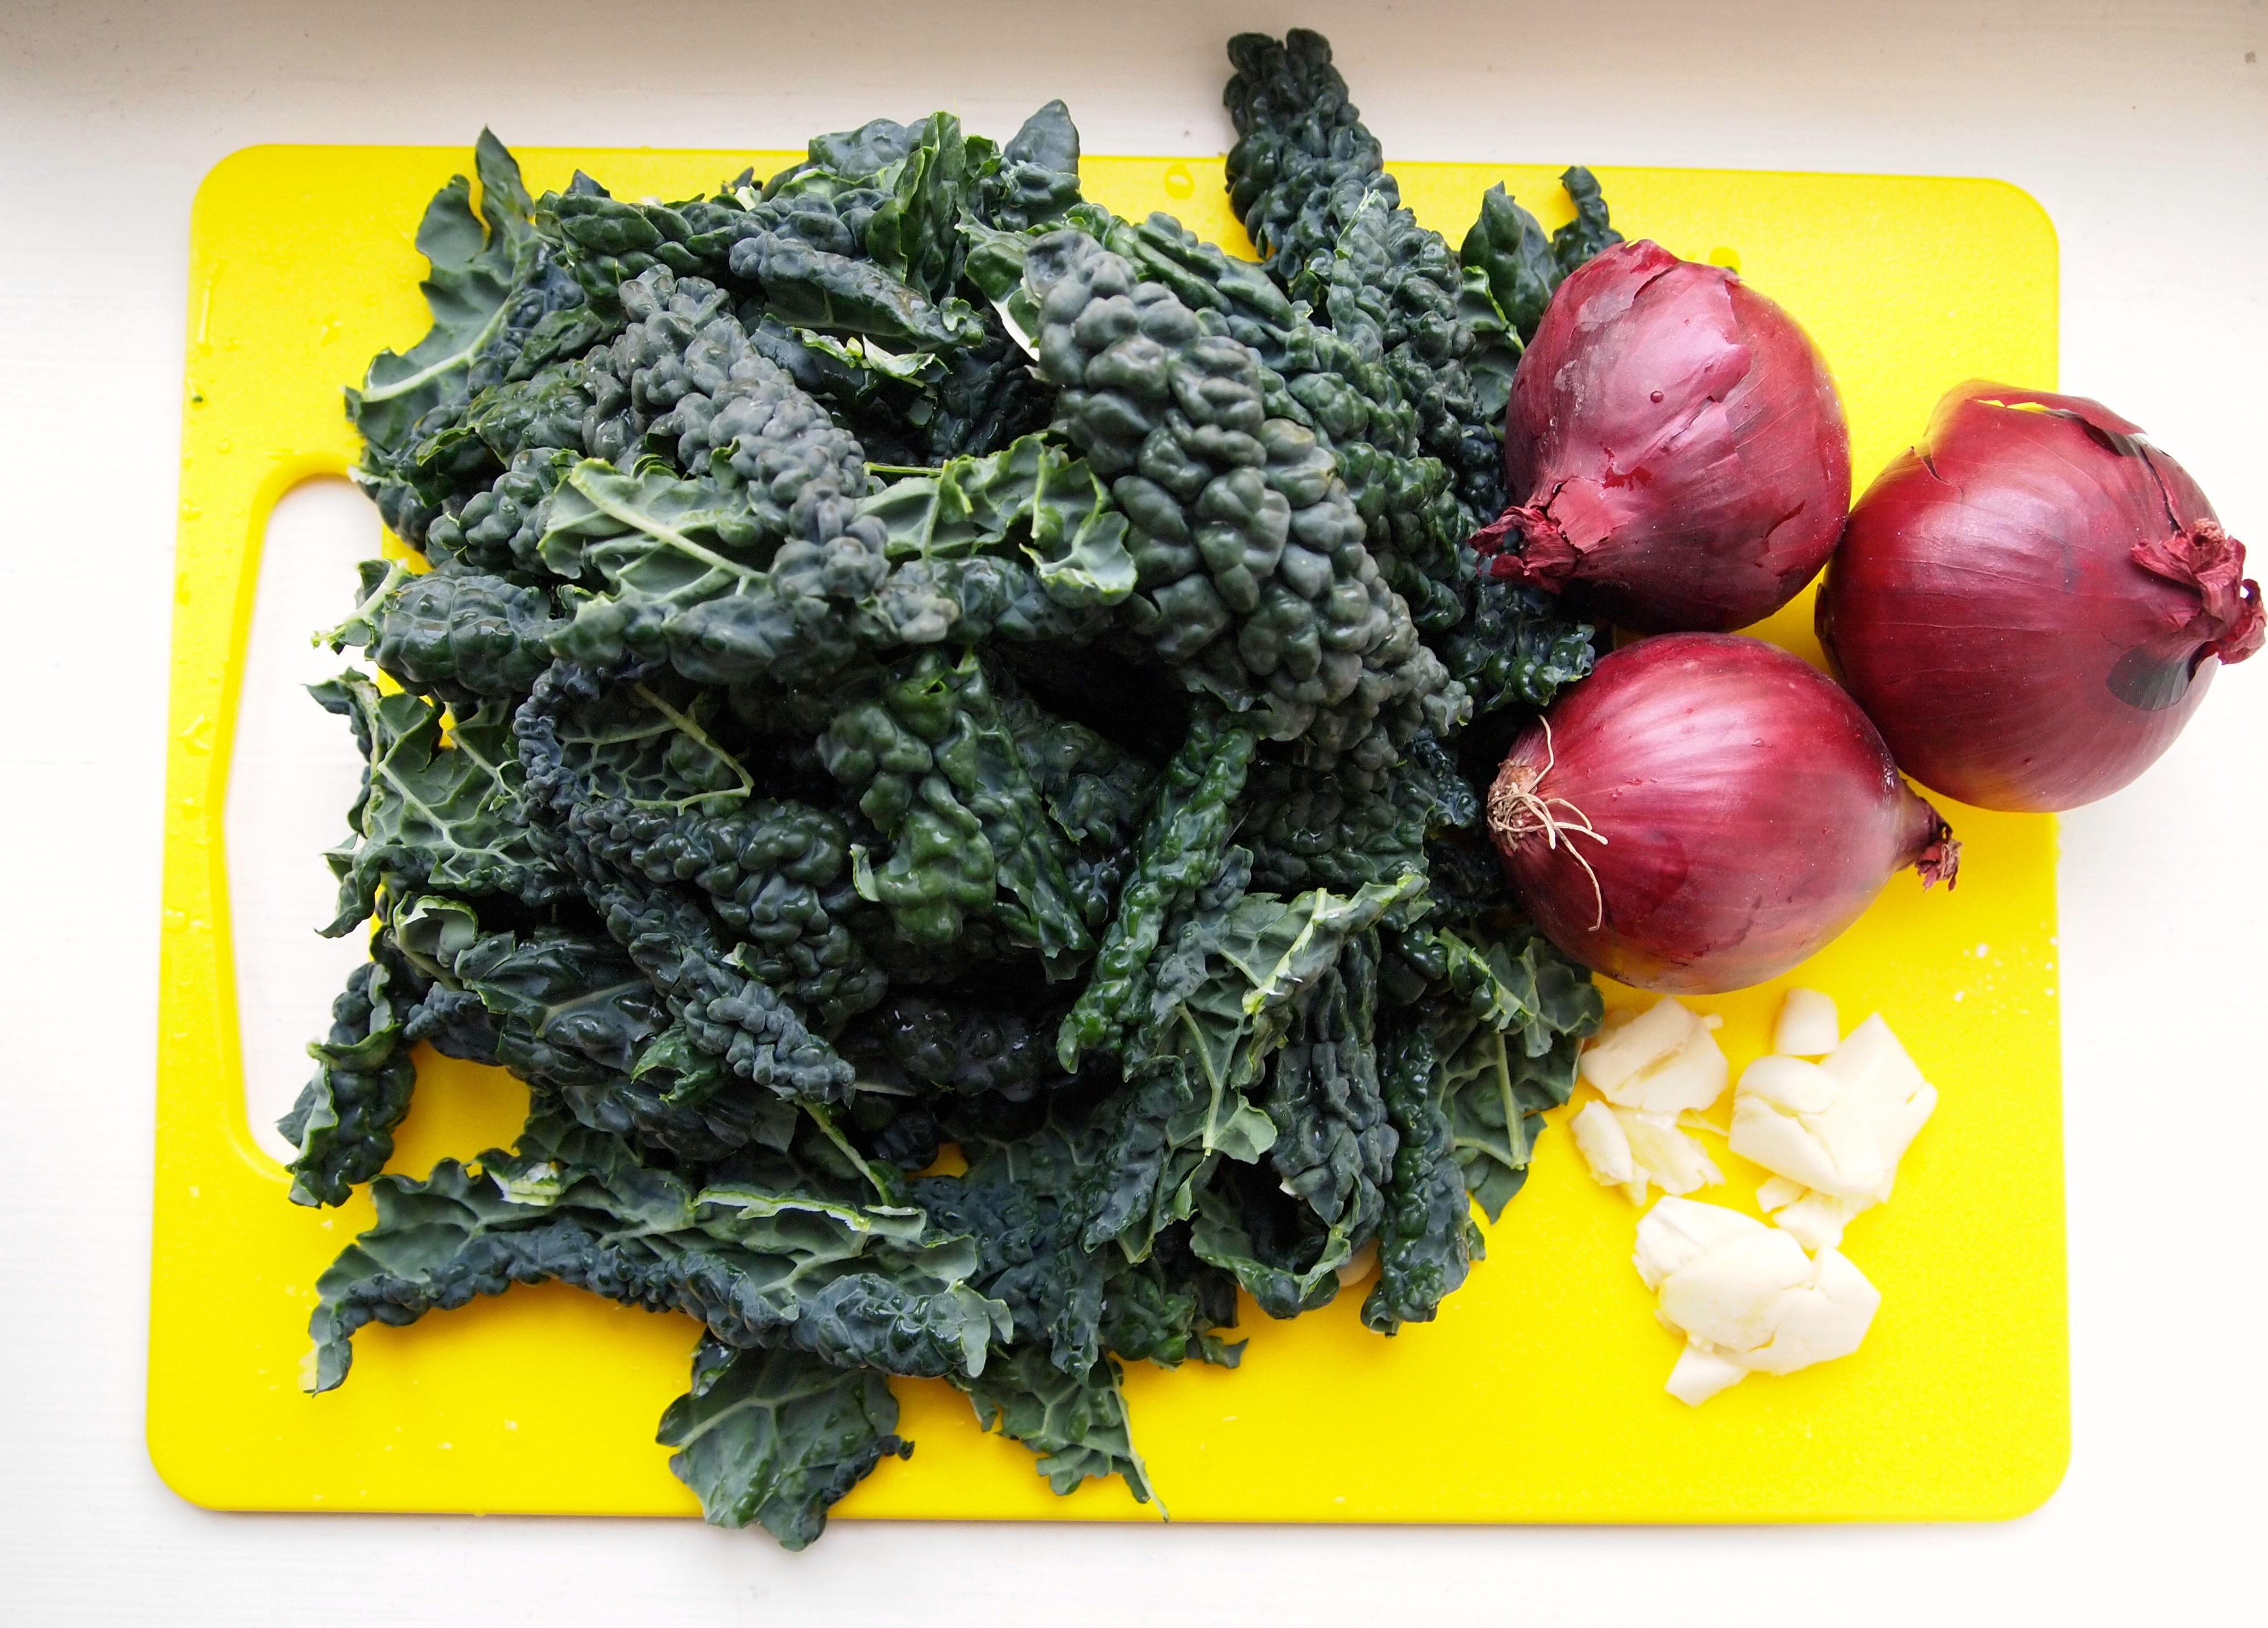
  • 1 bunch of kale washed, de-ribbed, and cut into pieces
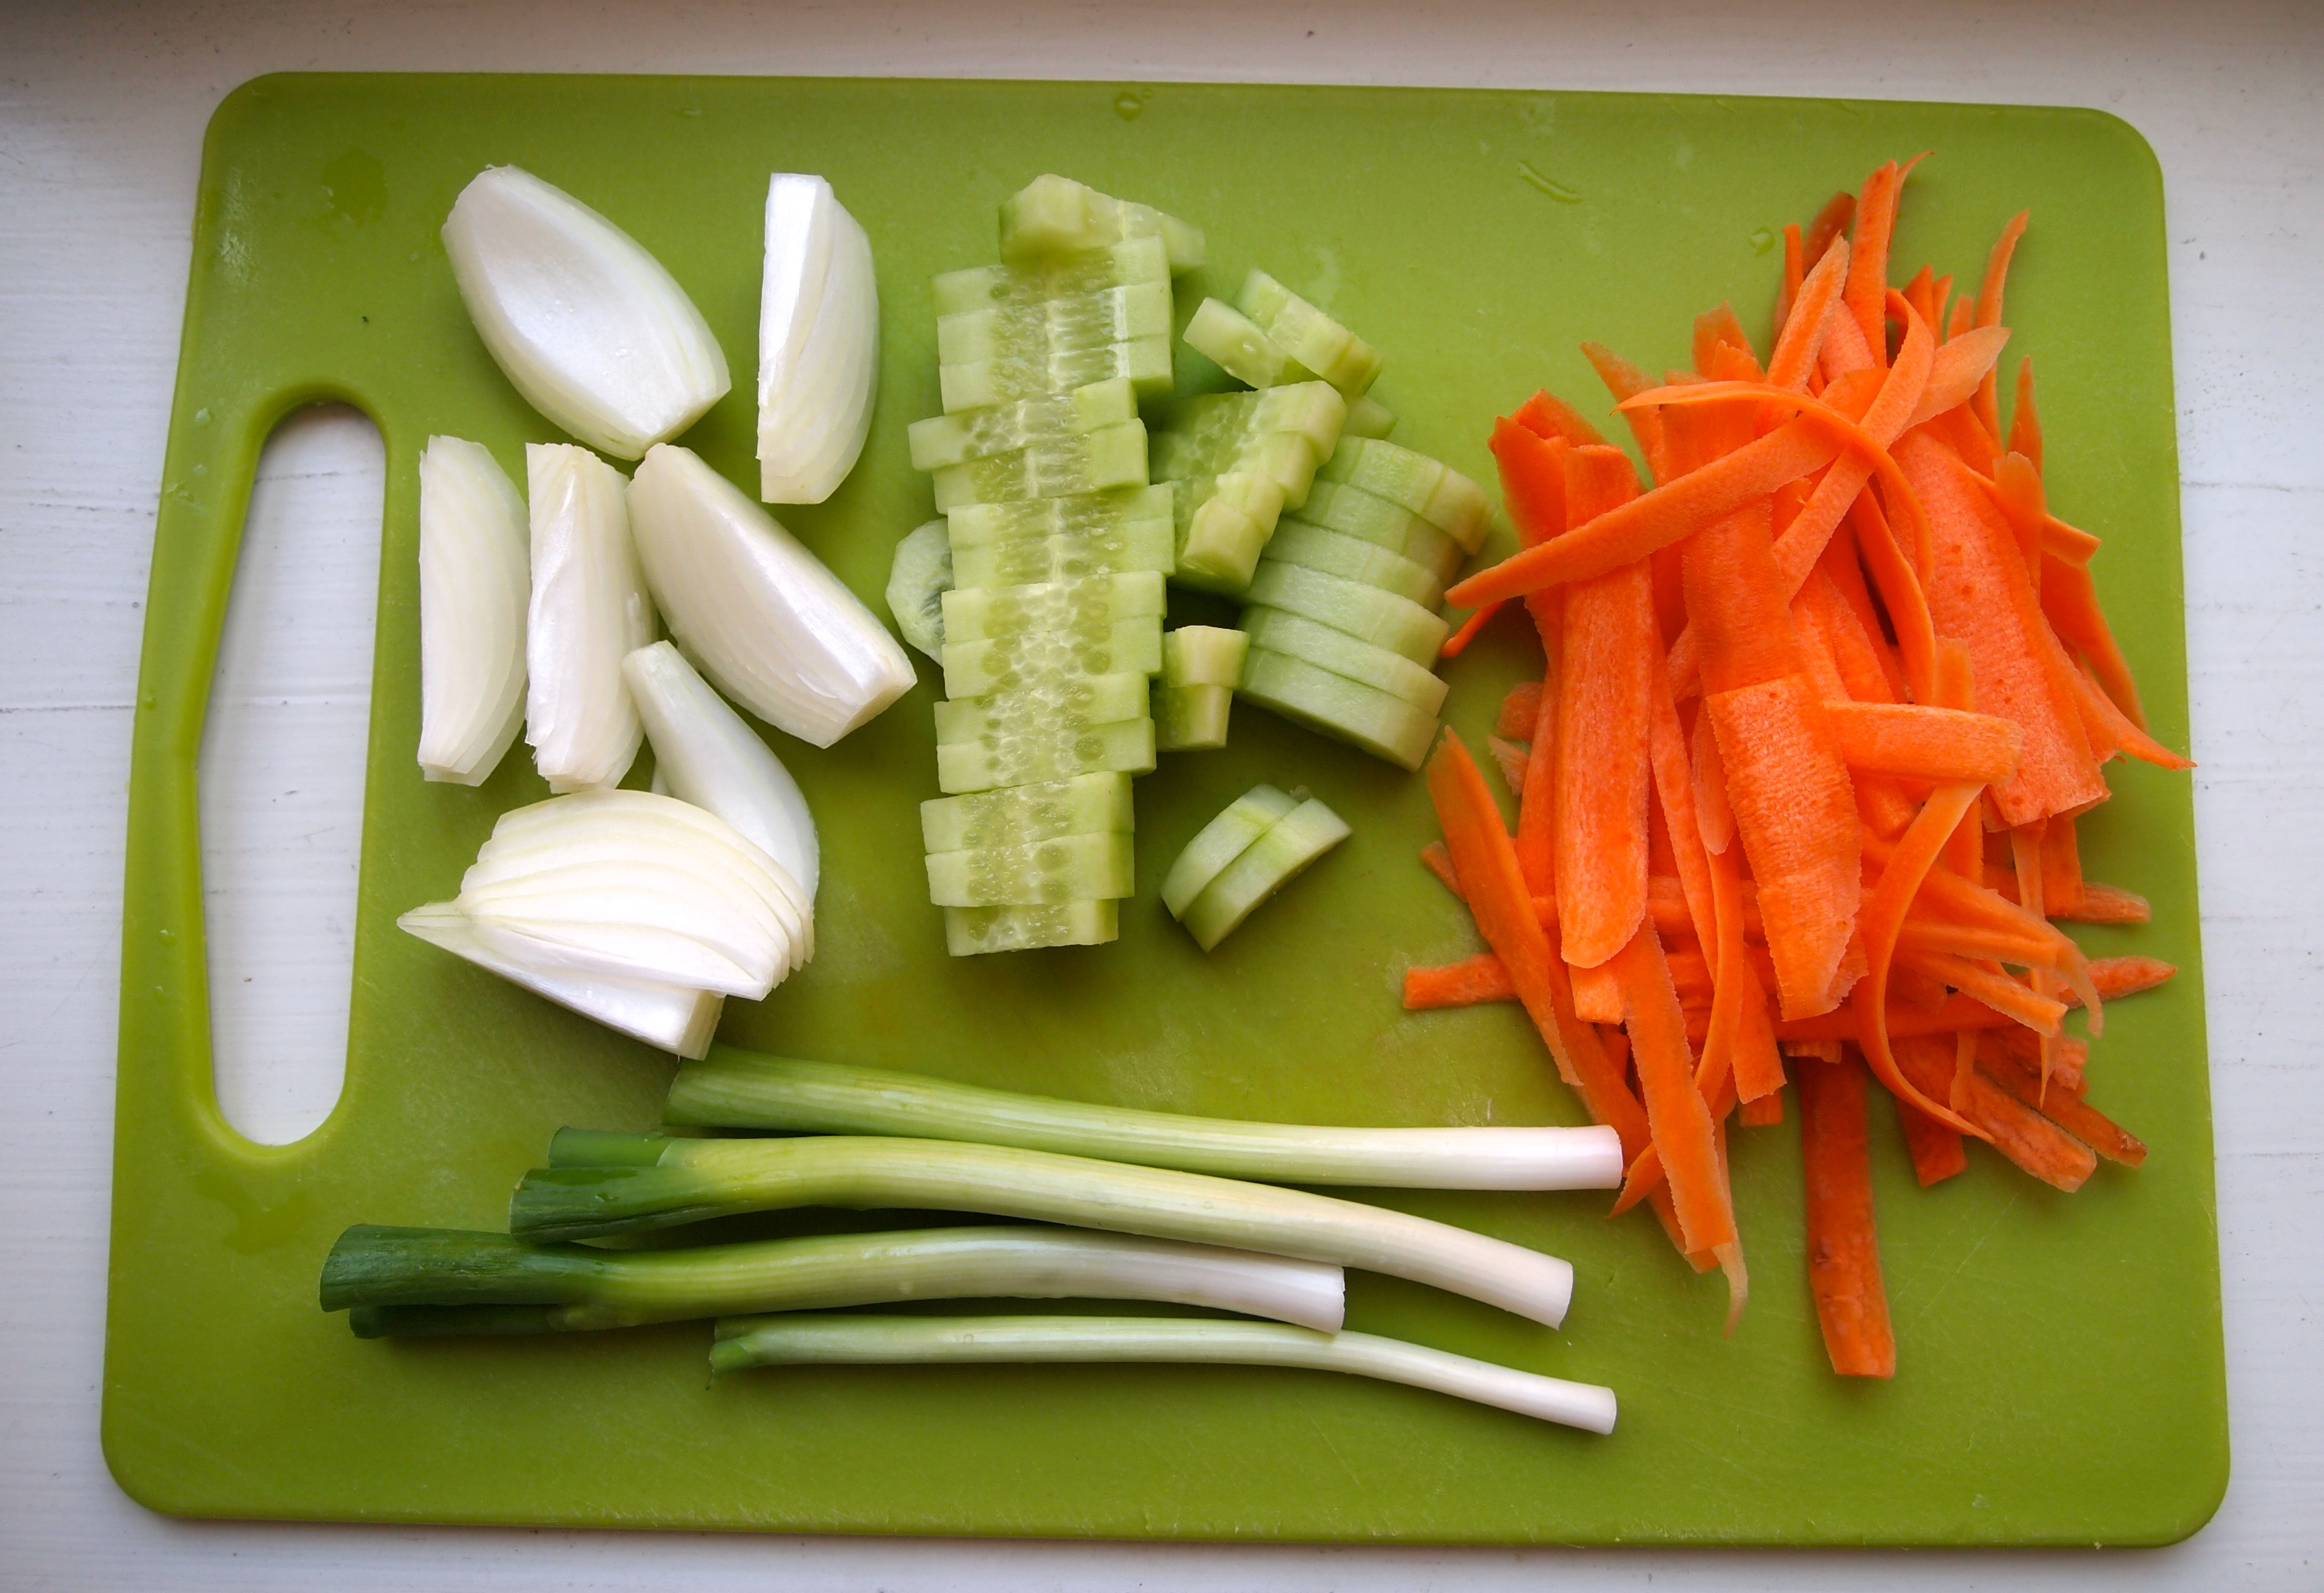
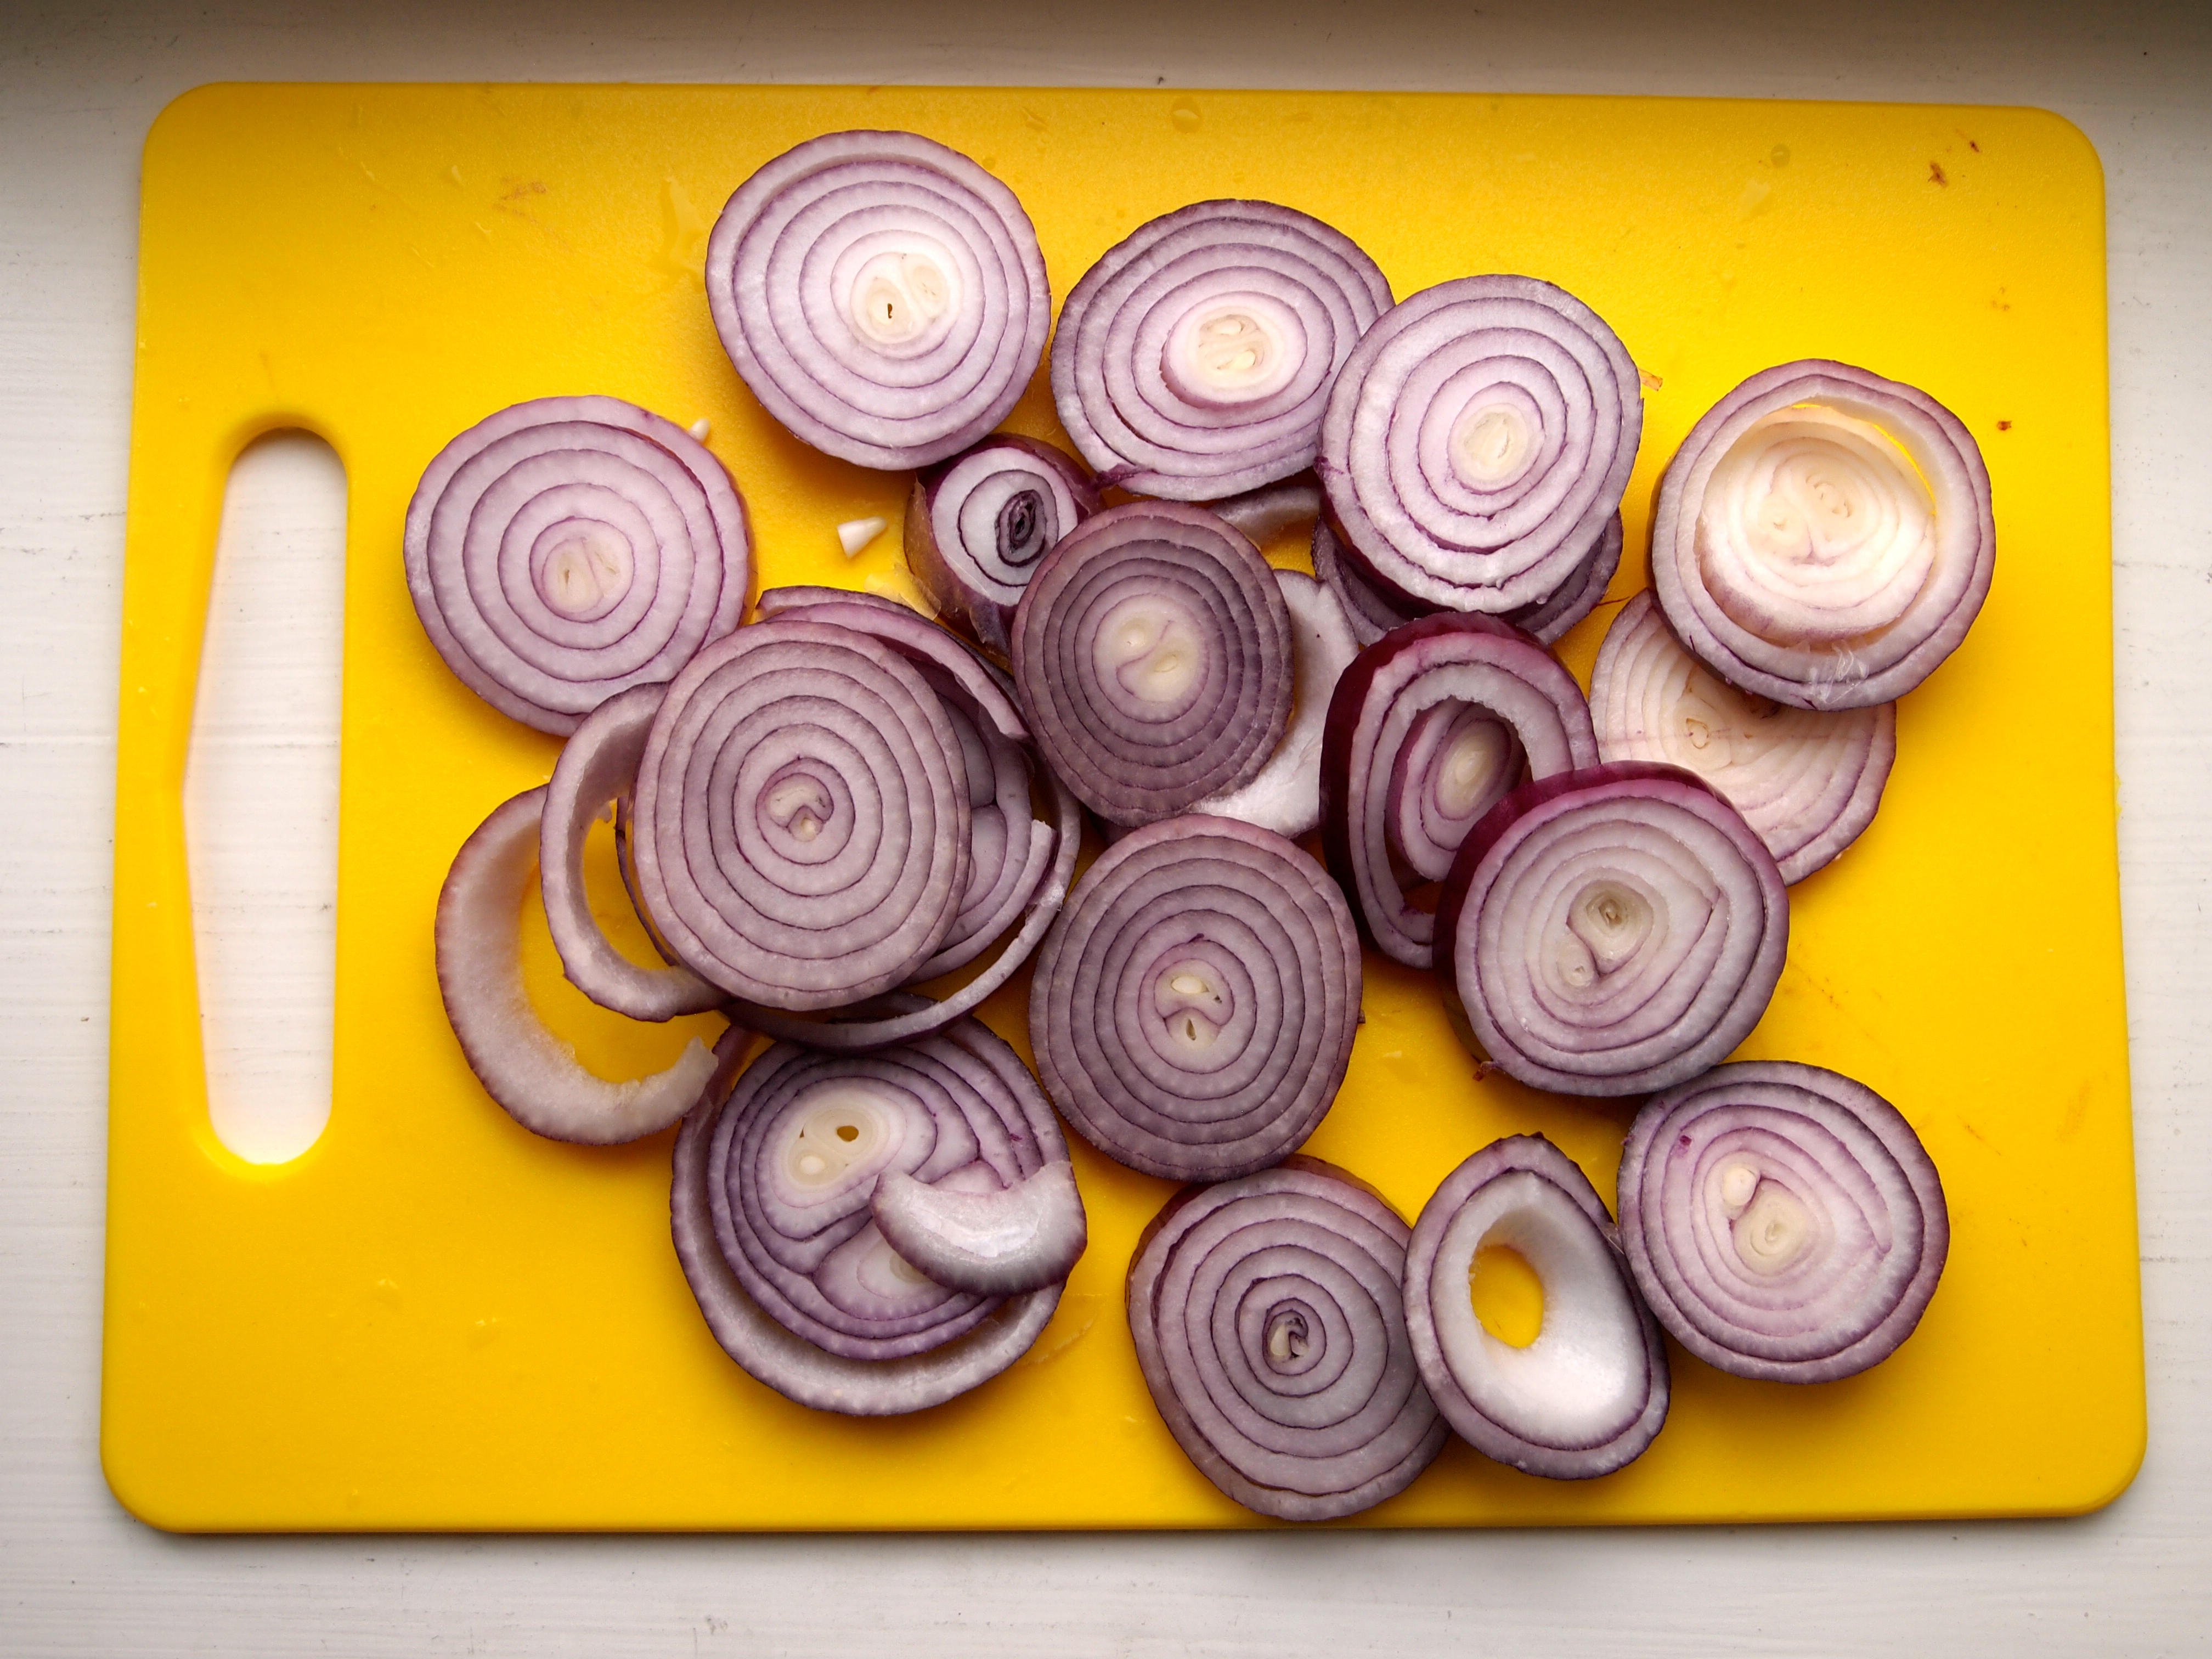
  • 2 red onions, peeled and sliced
  • 2 Tbs olive oil
  • 3 cloves garlic peeled and smashed
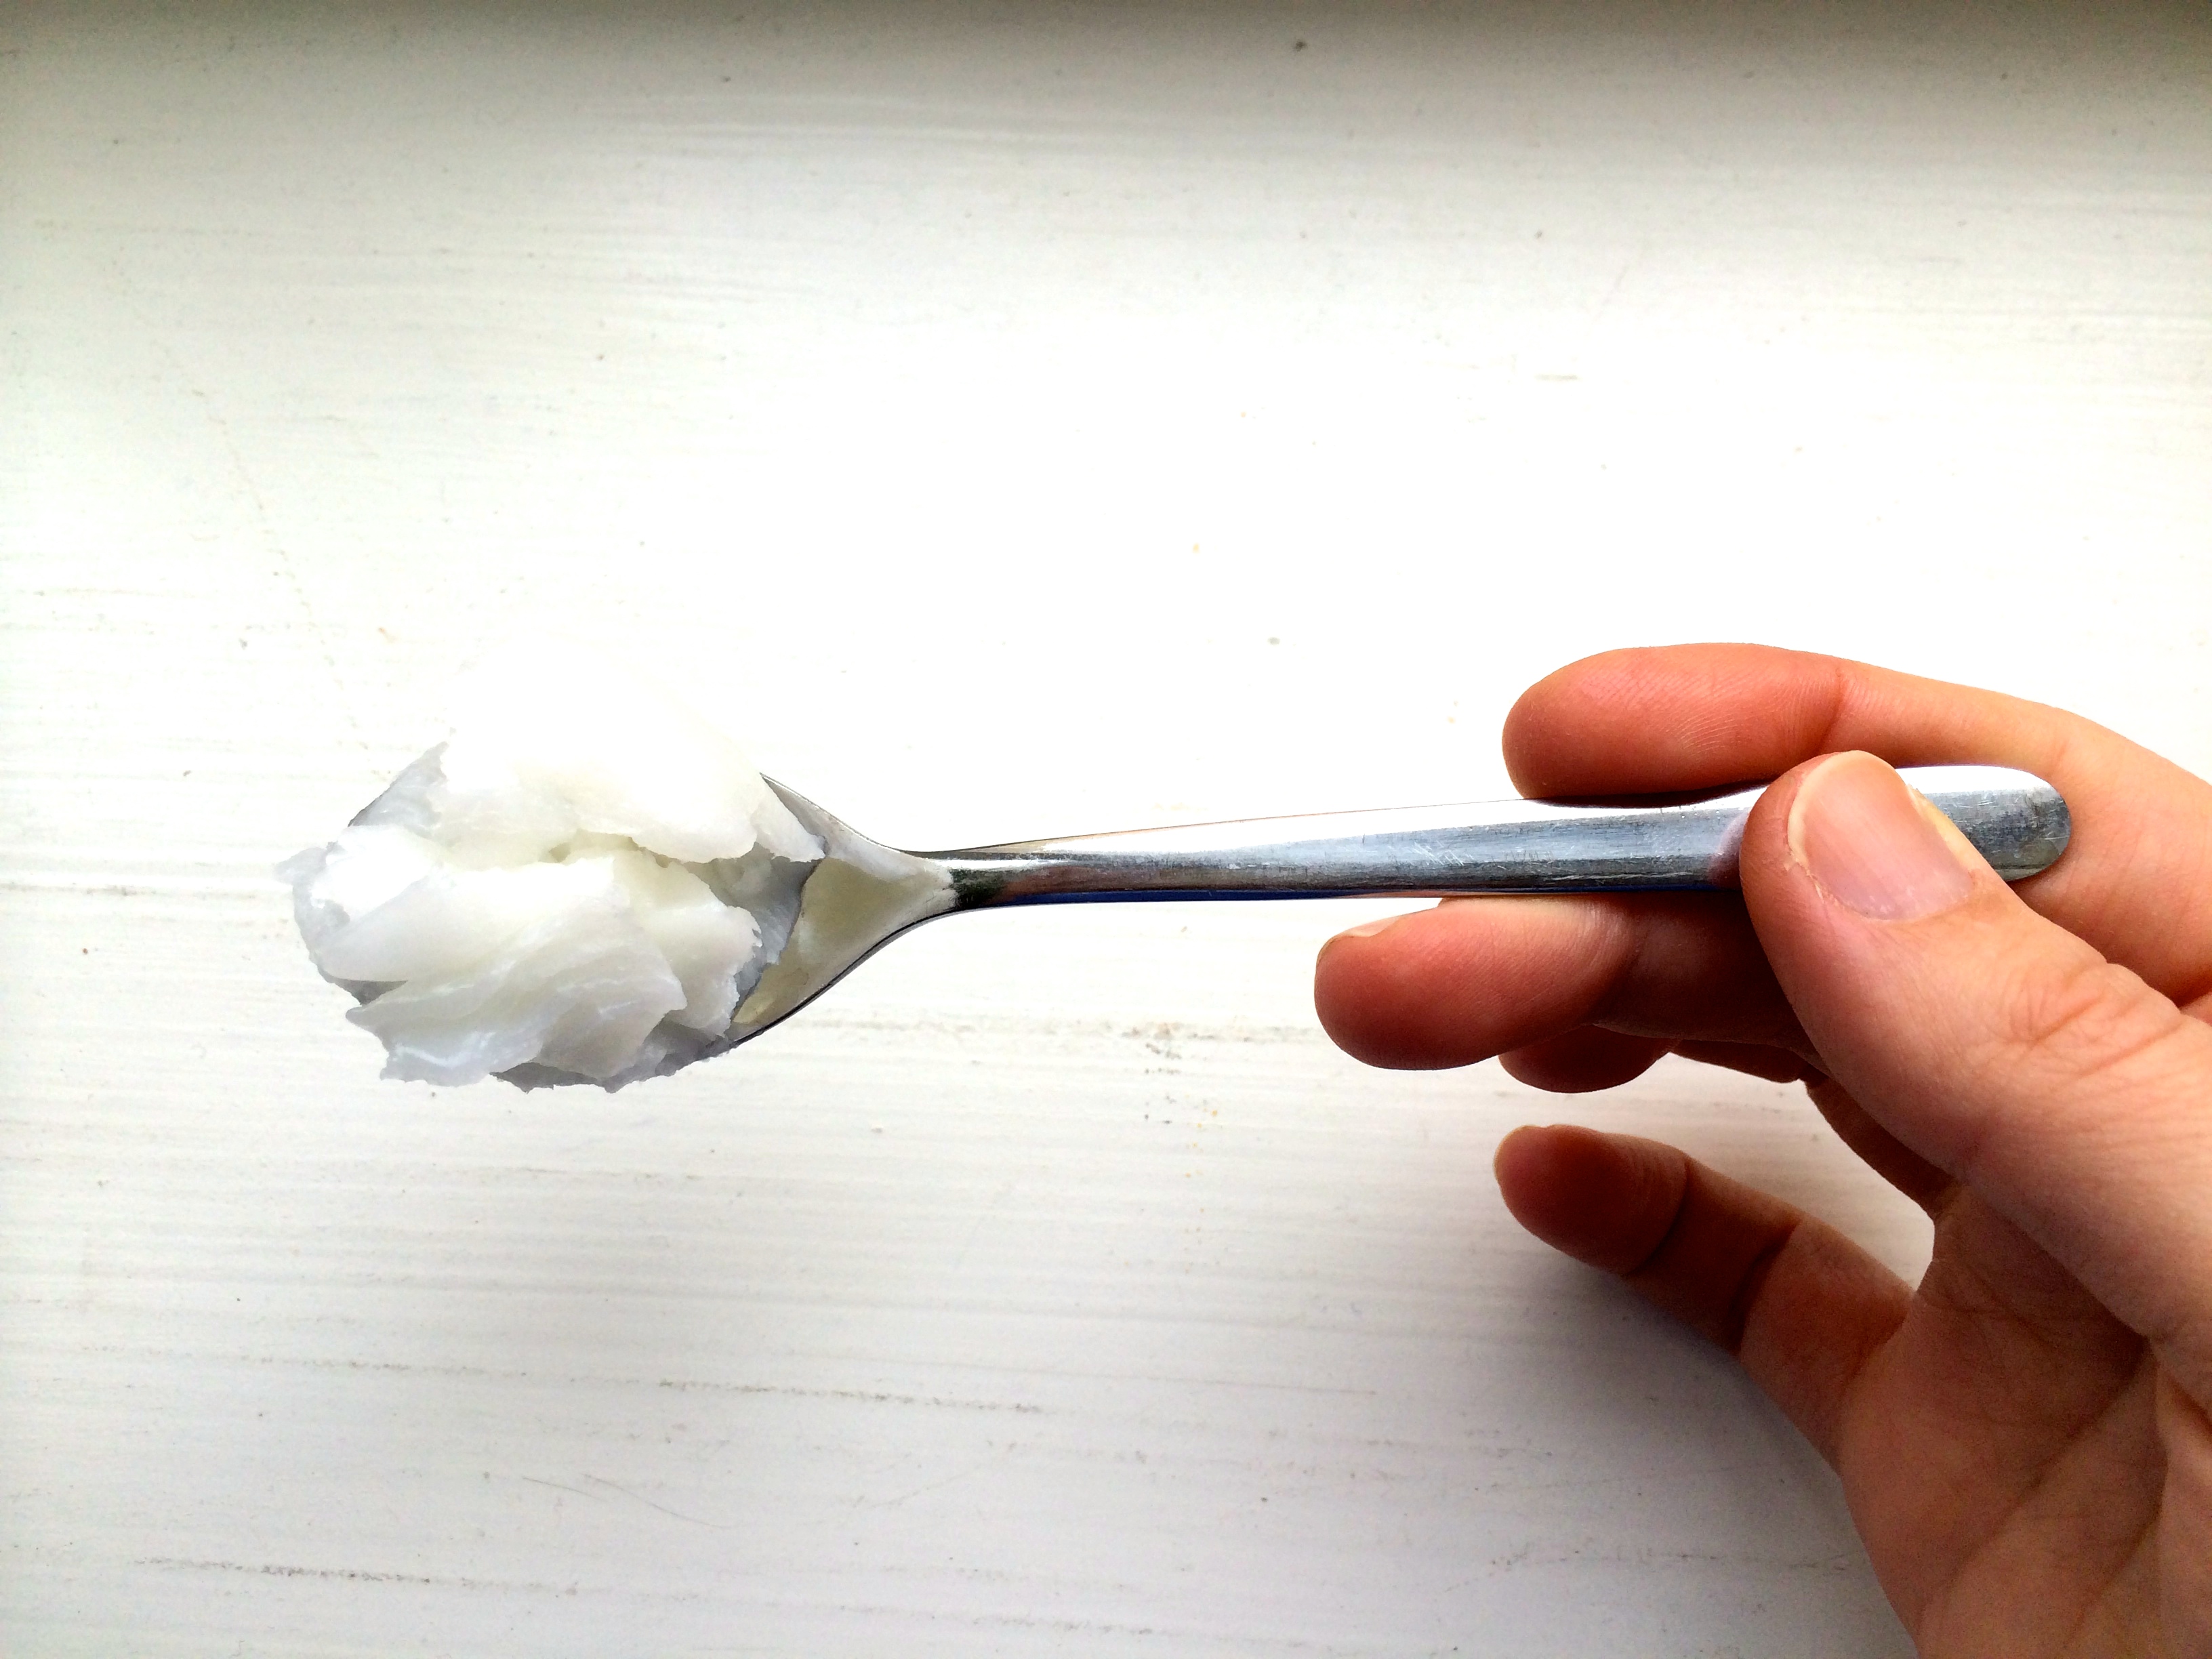
  • 2 Tbs butter
  • 1 sweet potato sliced paper thin (I use a mandolin – might be hard without one)
  • .5 – 1 cup water
  • 1 – 2 cups mozzarella cheese shredded

Directions:

1. Preheat your oven to the temperature required from your dough mix.

2. Prepare your pizza dough. Once risen, form onto your pizza pan.

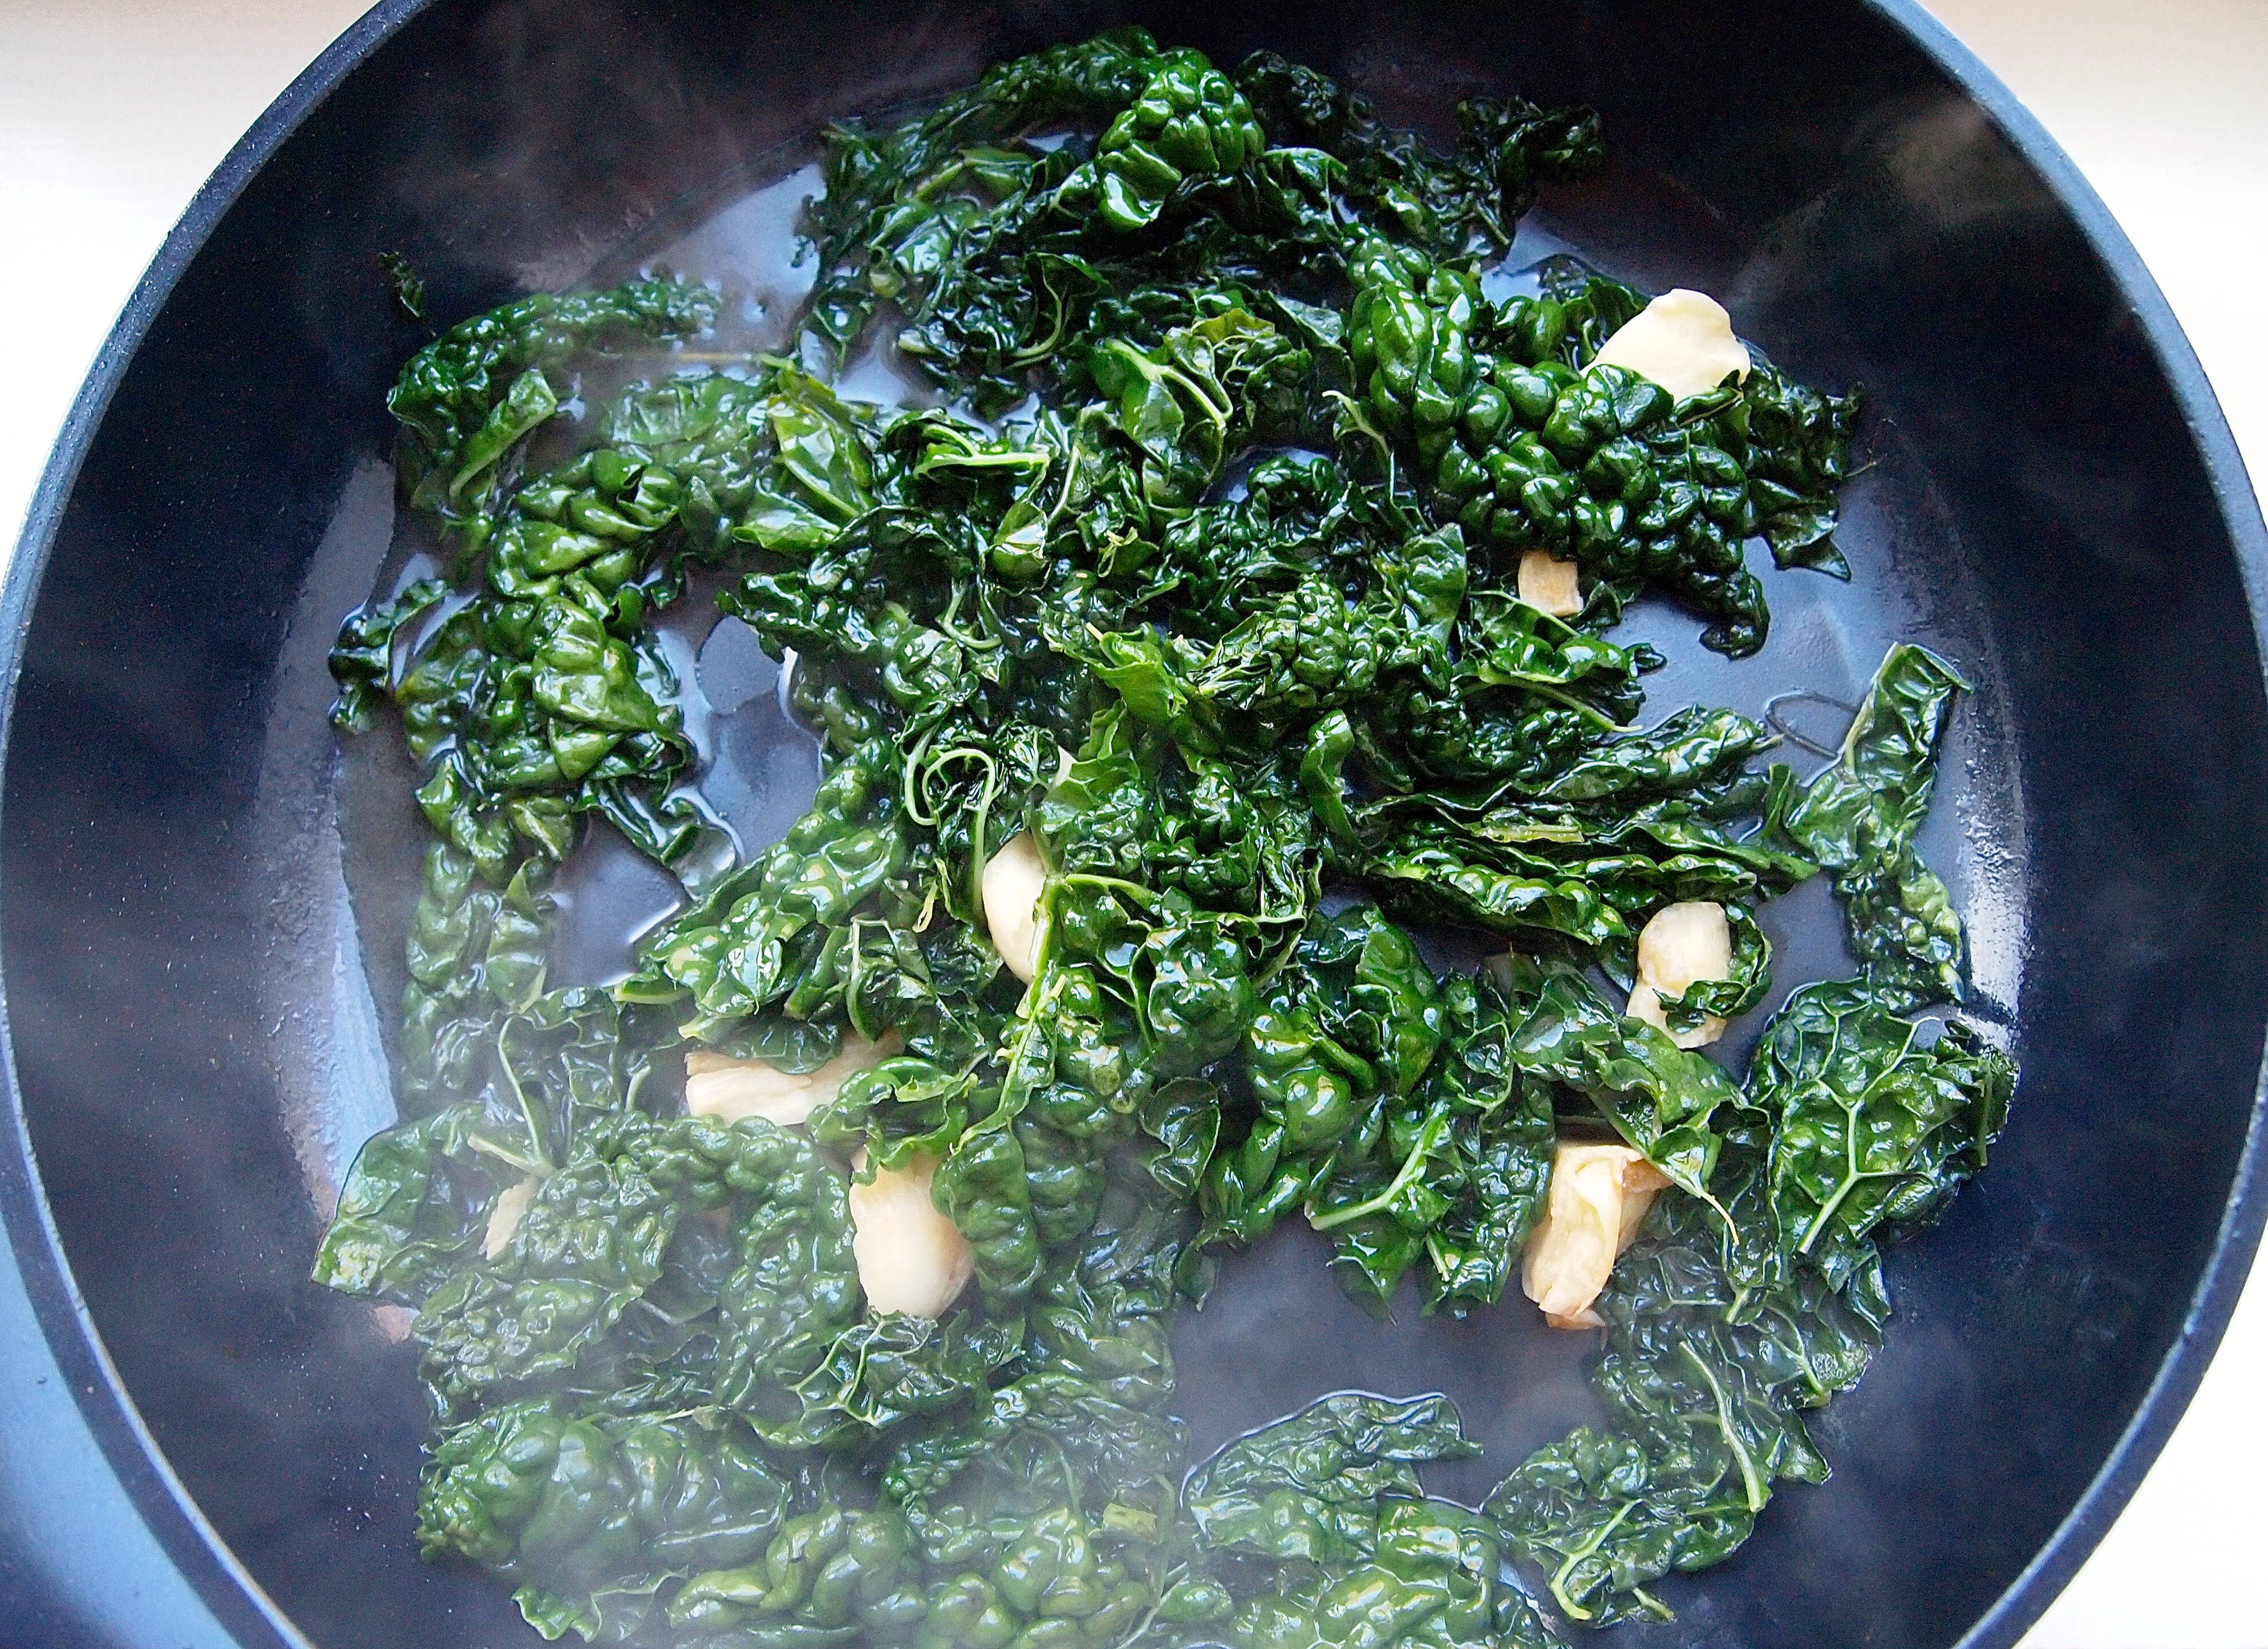
3. Heat a large frying pan with olive oil. Sauté your garlic for a minute. Don’t let it brown as it will get bitter. Throw in your kale. I like to sauté the kale a bit with the garlic and then add my water. I start with a half cup of water and then add a little more. Cover the kale and let it steam until it is tender. Don’t overcook it. Keep it semi-bright green. Set aside.

4. Sauté your red onions in the butter until tender and caramelized. Set aside.

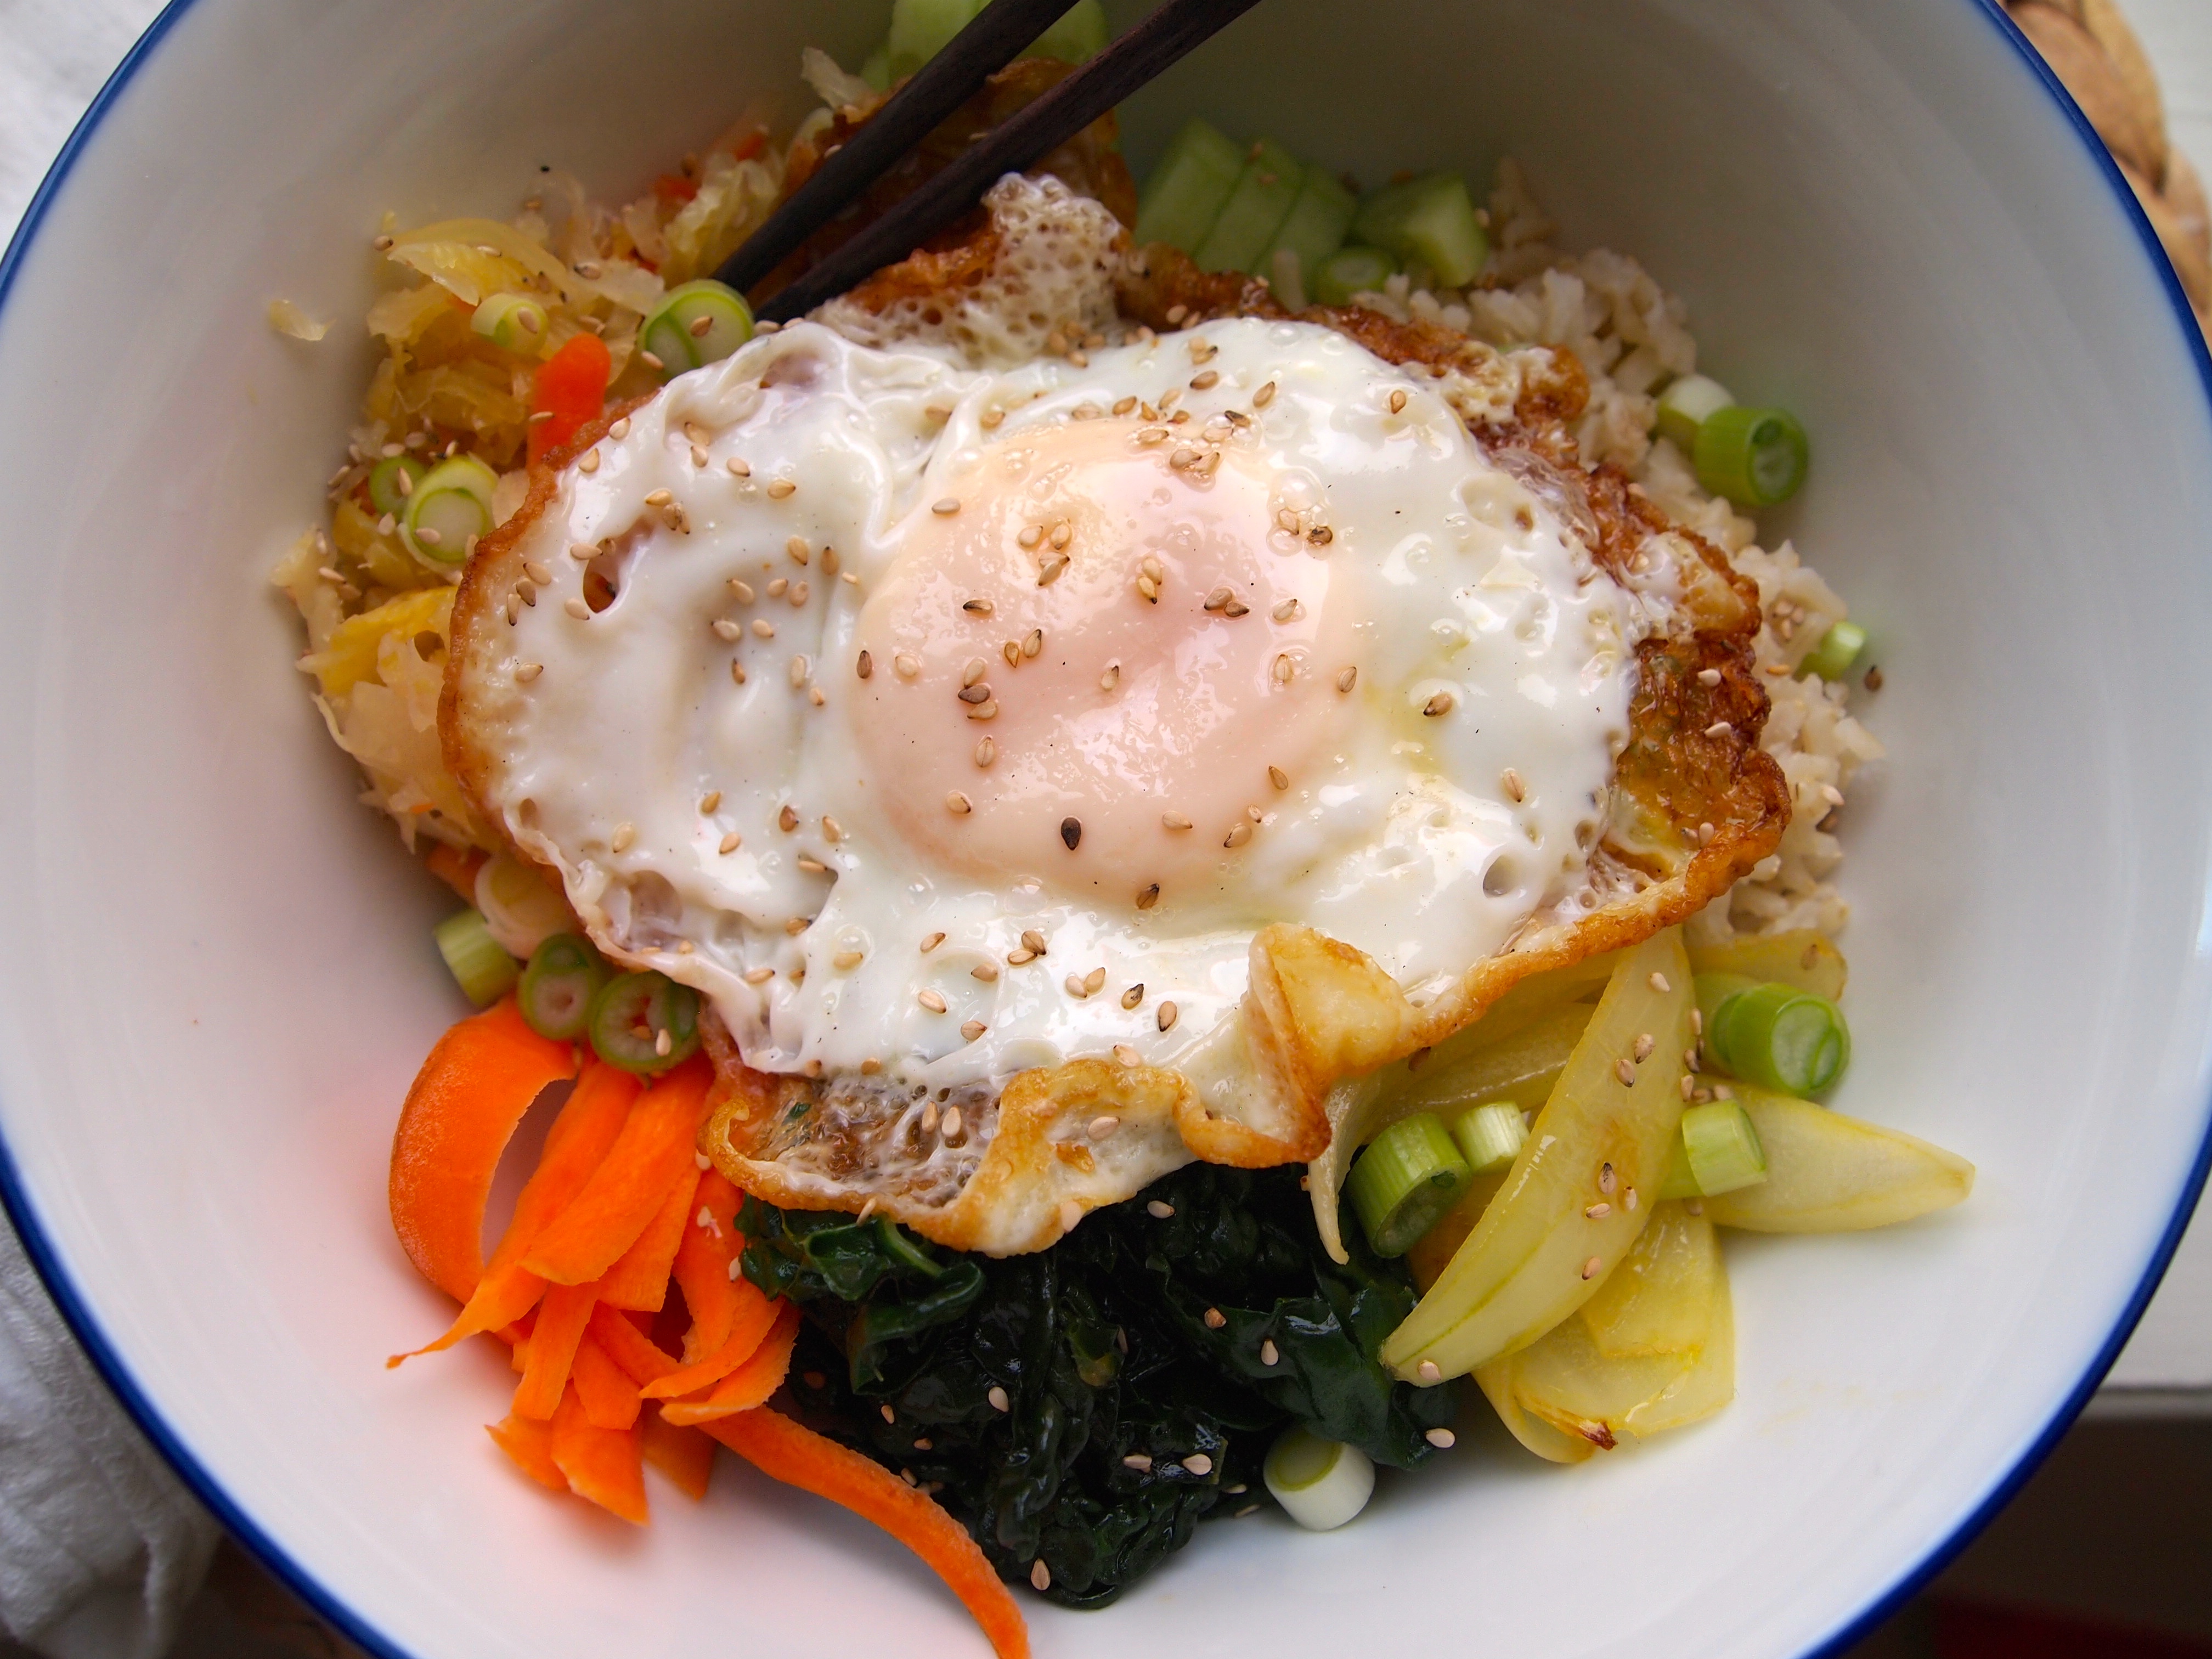
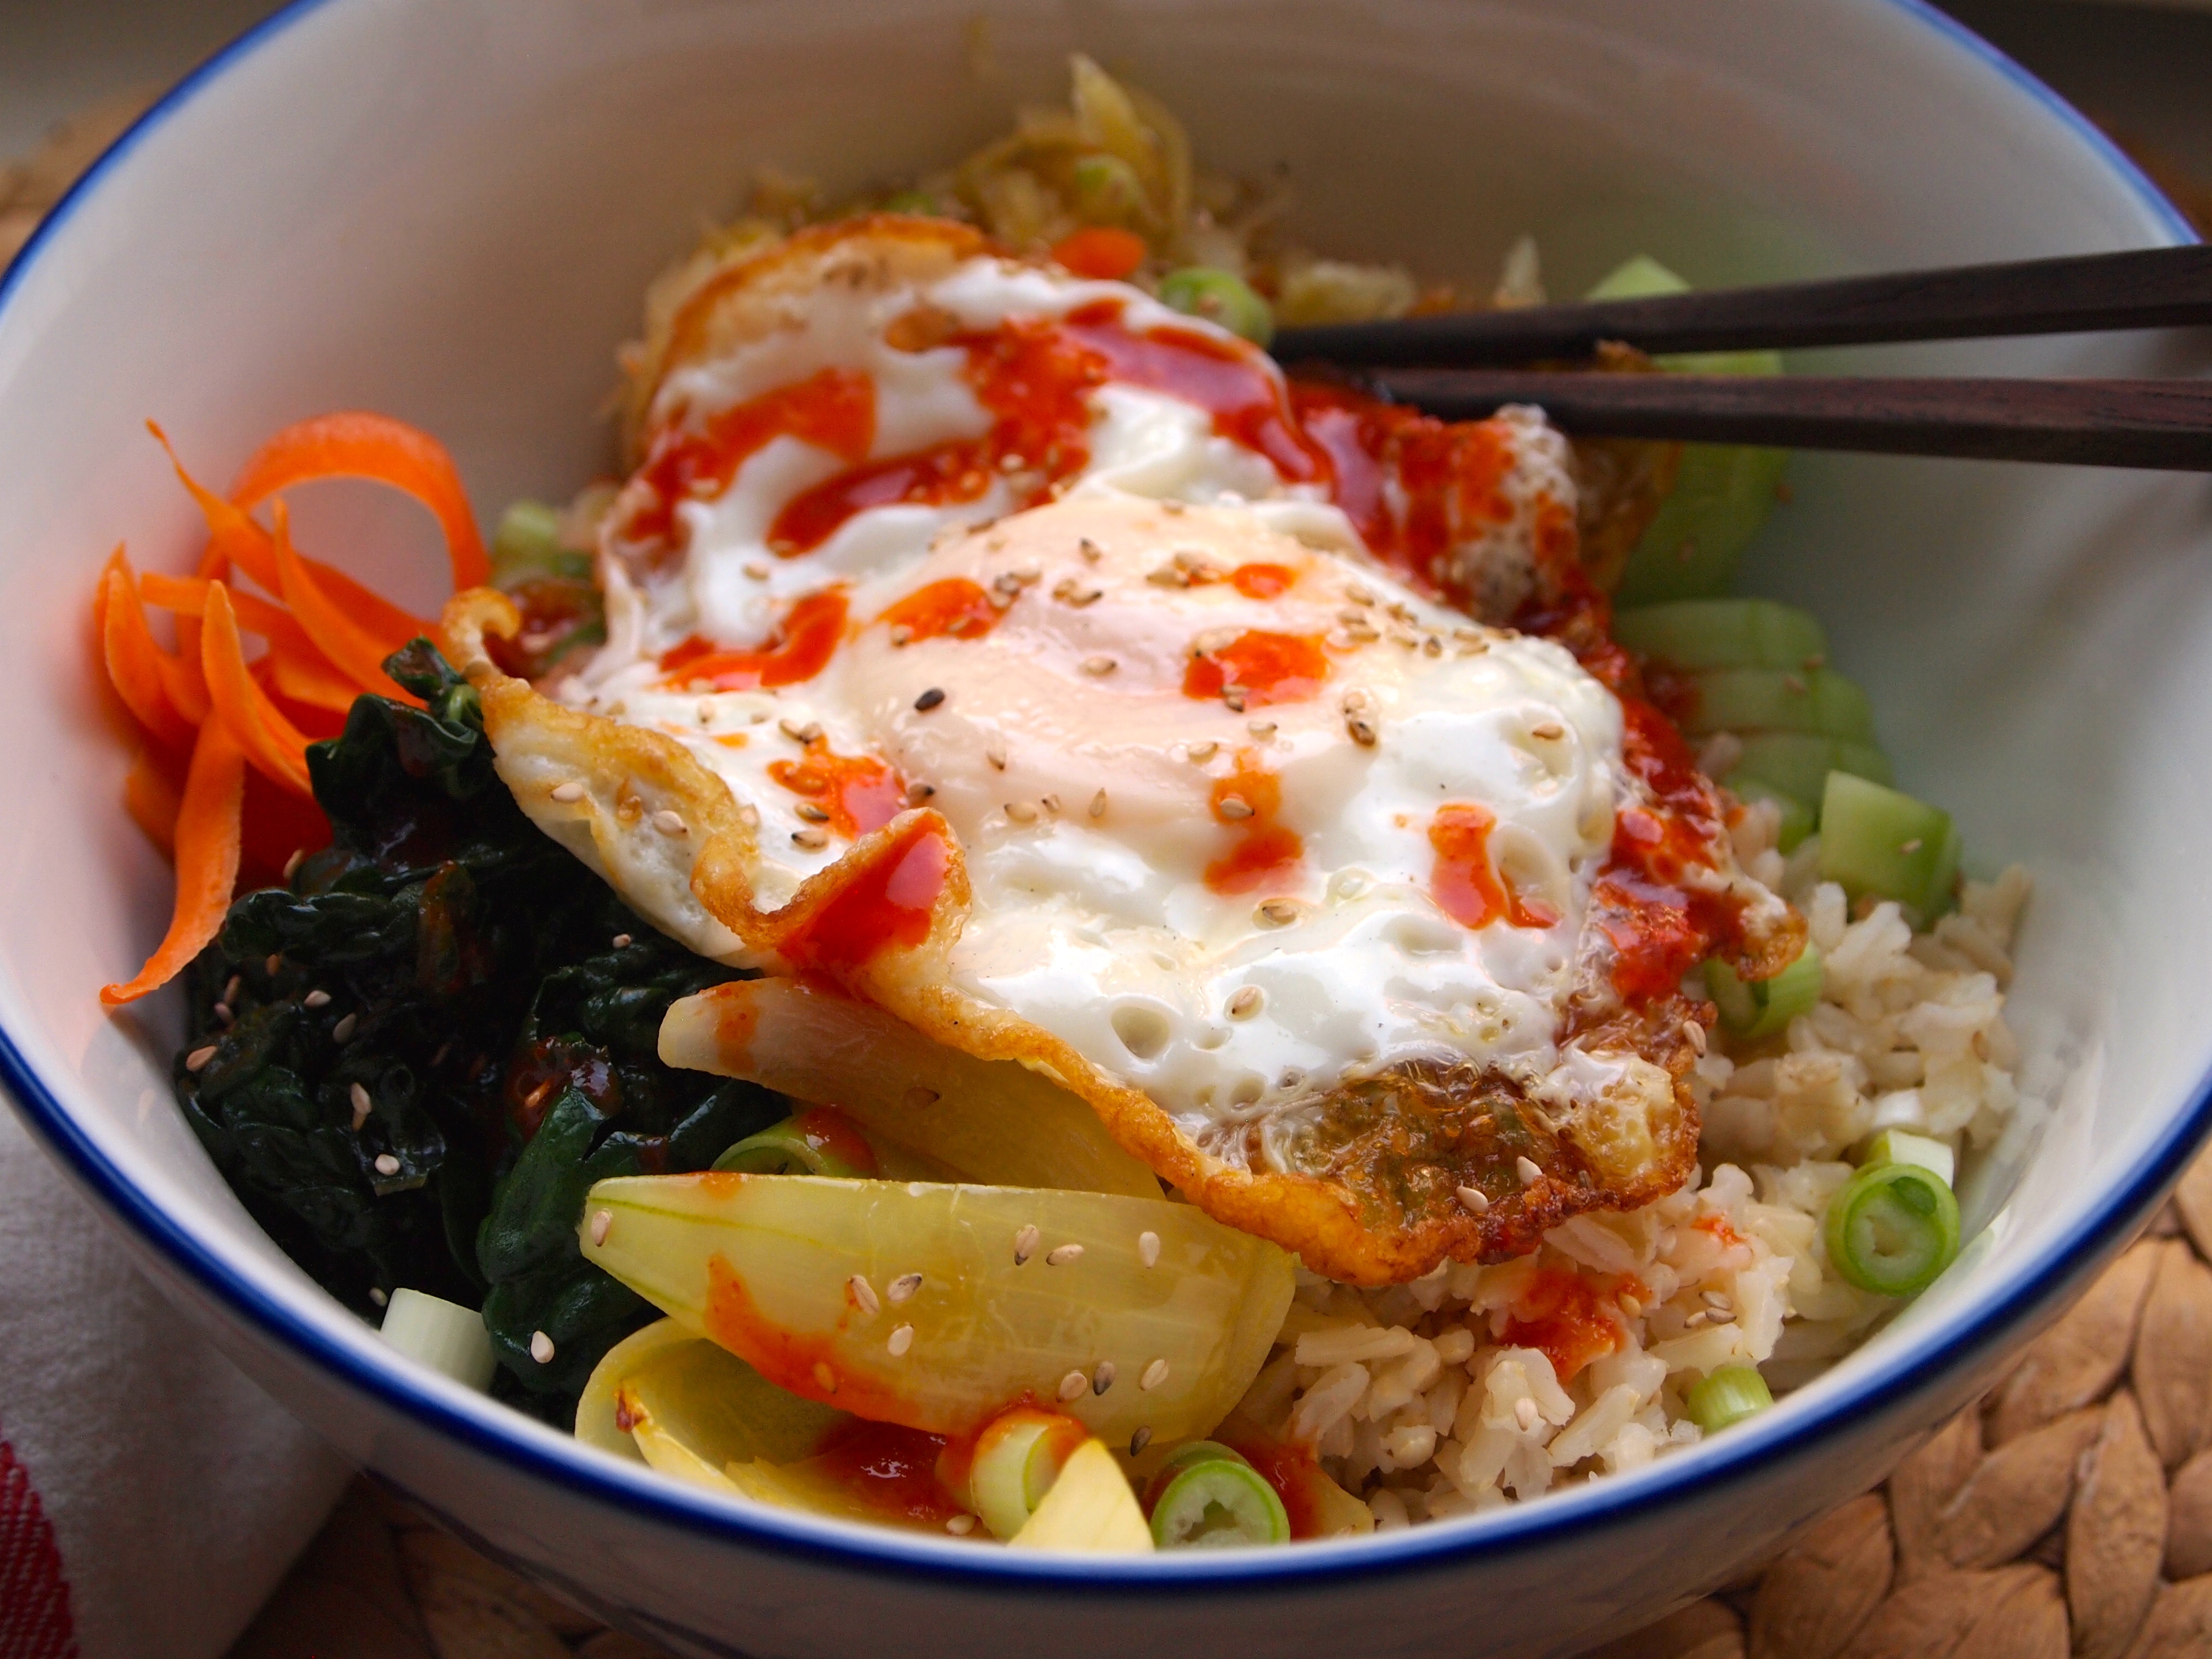
5. Arrange your pizza. First put your sauce on your crust by spreading from the inside to the edges. Next place a layer of the kale (if it is heavy with liquid ring it out a bit), then a layer of your onion, then the sweet potato, and finish with a nice layer of mozzarella. Throw some basil on top and toss in the oven. Enjoy!

P.S. Here is a yoga video for inspiration! Remember if you are doing the 30 Days of Yoga to post how it’s going in the comments section. 1 Day down! Good for you!!

Beet(le) Juice. And a 30 Day Yoga Invitation!

OLYMPUS DIGITAL CAMERA

I’m currently shoving a chocolate nut bar in my mouth, standing in our kitchen, staring blankly. No, really. It’s been a loooong day. The second day the little dove’s been home sick with a fever, cough, and runny nose (poor kid!). I’ve been thinking and thinking about how I want to write this specific post about beet(le) juice and my yoga invitation to you. Shoving low-grade quaaludes (aka chocolate with hazelnuts) in my face wasn’t what I planned.

But now, here’s the thing, isn’t that the real dirty side of life? Not the yogi sitting meditating under the tree, but the yogi hiding behind the tree glomming buddha goodies? Well, that’s real for me. I have my days or moments when I cave into an easy escape. Tonight it was the chocolate bar Mr. Wonderful brought home with him after he saw my ‘How long until you are here?? I am losing it….’ texts (and this) little gem that he sent to calm my nerves. Life isn’t always picture perfect, oh hell, it’s rarely picture perfect, and that’s okay, as long as we don’t cave into the easy escape all the time.

Spring is a really good time to evaluate this ‘yogi behind the tree’ behavior and change it. When I think of spring I think of renewal, fresh starts, and growth. It’s not exactly sunshine and roses over here in these parts yet, but the little buds on the trees and the tease of a semi-warm day is enough to get me motivated for a clean, fresh start.

There are probably a thousand ways to transform yourself after winter. I’ve already shared a few on here to help get you started. But I wanted to do something communal. I have seen a lot of yoga ‘challenges’ online lately, but I didn’t want to call it that. I thought ‘invitation’ was more, um well, inviting  – especially for folks who haven’t done yoga or haven’t done it in a long time, or for anyone who wanted to be a part of something transformational without feeling the pressure of a challenge. I wanted to create an invitation to a lifestyle change, something that would last. While this is a 30 day invitation, my hope is that it will go beyond the initial 30 days and become part of our daily routines. They say it takes 30 days to change a behavior or form a good habit. So that is the platform we’ll jump from.

My invitation is for all of us to do 30 minutes of yoga practice everyday for 30 days. What that yoga practice will look like will be different for everyone depending on what you need. Your daily invitation can be met at a yoga studio class, a home practice, with friends in the park, etc. Essentially, I didn’t want to get too dogmatic in what your daily yoga should look like for you. Our lives, experience with yoga, and schedules are all so diverse. It’s best if you choose how you will fulfill this daily ritual. 30 minutes of yoga for 30 days, every. single. day.

OLYMPUS DIGITAL CAMERA

Although i’m certified to teach yoga, I’m far from feeling like a yoga teacher. Right after I received my teaching certification, I went into a really tough pregnancy and subsequent tough labor and postpartum. My plans to jump into teaching got waylaid by motherhood, and that’s okay. But now I’m back on the path and my deepest desire is to teach yoga and eventually to use yoga as a healing tool with human rights activists that are burnt out from the important work they do. This invitation is my first step in teaching. I chose this virtual space to start. The invitation starts this Saturday, April 12th and will go until May 12th and I do hope you’ll join me!

Here is how it works:

1. If you want to join this 30 day yoga invitation sign in and comment under this post – that way we know who we are and have the encouragement of community. I hope to see many of you there!

2. Practice yoga for 30 minutes everyday for 30 days. My request to you all is that your daily practice close with a 5 minute Savasana/corpse pose (either within the 30 minutes or outside of them – up to you). Savasana, is the end goal of our yoga practice as yoga is quite literally the practice of ‘moving into stillness.’ The goal of yoga is not the asana (or pose) it is moving the energy through our bodies to get into true meditation. Many yoga teachers include a minute-long Savasana or leave it voluntary. I believe Savasana is deeply important for our bodies to digest the asanas we’ve just done. 5 minutes may sound long, but you’ll thank me later, promise.

3. Post comments and/or questions about your daily practice. I will do my best to answer questions and provide some inspiration as well.

4. At the end of the 30 days we can share in this space what this daily ritual was like for us, if we will continue it, what challenges (if any) came up and how we dealt with them, and what our yoga plans are for the future.

It might sound scary, or even revolting, depending on where you are at. But, I am going to challenge you to think about how much time you waste during the day – particularly on the computer. 30 minutes is not that long. And, by joining in with others you have the added benefit of support. I know you can do this.

OLYMPUS DIGITAL CAMERA

OLYMPUS DIGITAL CAMERA

As a reward for all your hard work, you can make this amazing beet(le) juice smoothie. I mean, just LOOK AT IT. Holy baby Jesus, it’s fluorescent! It feels almost electric and tastes incredible. It’s packed with goodness. Beets, lower your blood pressure, boost your stamina, fight Inflammation, are full of anti-cancer properties, are rich in valuable nutrients and fiber, and provide detoxification support. These qualities make beets a great addition to our yoga practice and spring transformation. I know, beets in a smoothie, ewww. That’s exactly what I thought. But, trust me, it’s like nothing I’ve tasted before. Dreamy really. This smoothie is also packed with apple, pear, banana, almond milk, and a touch of honey. Added benefit, the little dove LOVES it.

OLYMPUS DIGITAL CAMERA

Beet(le) Juice Smoothie:

Ingredients:

  • 3 ice cubes
  • 3 – 4 small peeled and cooked beets
  • 1 whole apple peeled and chopped
  • 1 whole pear peeled and chopped
  • 1 whole banana peeled
  • 1 cup almond milk (or another non-dairy milk)
  • 1 Tbs honey

Directions:

1. Peel a bunch of beets & cut the ends off. Cut them into 1 inch pieces. Throw them in a pot and cover with water. Bring to a boil and then simmer for about 30-40 minutes. The beets are done when they can be pierced fairly easily with a fork.

2. Take beets out with a slotted spoon and set aside to cool. To the beet juice in the pot, add a splash of vinegar and a dash of salt, let cool, and pour into a mason jar. Store in your refrigerator and wait for and exciting recipe using this coming here soon! DON’T put this beet juice in your smoothie! The beets you don’t use in your smoothie can be kept in the refrigerator for up to a week and used in more smoothies.

3. Place your ice cubes, cooked beets, apple, pear, banana, almond milk, and honey in a blender. Blend on high until completely smooth. Make this and join me for the 30 day yoga invitation! Sign in below and enjoy!

OLYMPUS DIGITAL CAMERA

Make-Shifty, Shape-Shifty Bibimbap! Healthy One Bowl Fun for the Whole Tribe.

When I was little we rented an old house on Spruce Street that had a cherry tree in the front yard. The house had a huge staircase when you entered and beautiful wood floors throughout. The kitchen was old and big and I spent a lot of my days on the counter watching my parents cook. We had fresh milk delivered in glass bottles on the back porch. Through our backyard you could see the hot tub store on the corner (if that doesn’t scream the ’70s, I don’t know what does). They had hot tubs on the roof and you could rent them hourly. At night we could see people up there staring at the stars and singing… naked, ahem.

Every night we would sit down for dinner in our wallpaper clad dining room (Wes Anderson would be jealous), and my parents would put the record player on. It was old, with brown panelling, like everything in the late ’70s and early ’80s. My Dad was hyper sensitive about the needle and we had to take extreme care if we wanted to put the records on ourselves. As soon as we finished eating we would start dancing. It was often The Harder They Come by Jimmy Cliff – we loved ‘Sweet and Dandy,’ ‘Johnny Too Bad,’ and ‘You Can Get it if You Really Want,’ or Walking on Sunshine by Eddy Grant and we’d sing along ‘oh mamma mamma you’ve got me livin’ on the front line’, or it could be Simon and Garfunkel, The Rolling Stones, or Muddy Waters.  We would all just dance and dance and dance. These are perhaps some of my greatest memories of my childhood, which while not idyllic (whose was?), had it’s supremely beautiful moments.

I was born into music. I have few memories that are not directly linked to specific songs or albums. The lifestyle that my parents, perhaps unknowingly, created with our after dinner dance parties, is a great one. Now, when I cook and eat with Mr. Wonderful and the Little Dove, there is always music on. And we were listening to some great tunes when I created this dish. So slap on some wax, or turn on your iTunes, however you bring music into your world, turn it up, move your body, and make this now.

Dang! We ate this the other night and I had to get it on the blog ASAP. I seriously couldn’t wait, amaa gaaad it’s that good. It’s easy, delish, super healthy, and gorgeous. To be honest, I feel kind of last-season that I haven’t made this before. I love me some bibimbap, but I’ve always been intimidated to make it at home, using all the common excuses: ‘I don’t know how to pickle kimchi. What are those other yummy veggies in there? They won’t have those at my grocery store. What’s in that sauce, gluten, msg? Fuggedaboudit. I’ll just go to the great Korean place in town.’ BUT NOW, but now, my dear dear friends, I broke through and found that sometimes compromising and monkey-ing with tradition a bit can be rewarding in it’s own way. Letting go of the perfection ideal can lead to some magical creations (a lesson I have to remind myself of daily hourly).

No gochujang? No problem! No fresh kimchi? No problem! No bulgogi? No problem! While this isn’t a fully traditional bibimbap, it’s packed with sabor and is really, in all honesty, going to knock your socks off. I made a make-shift gochujang sauce that was really good and hot damn spicy (the recipe is below too) and I bought, yes bought, some jarred kimchi at the store (*gasp* so not hipster-pickler of me I know! You can stop reading if you want, I understand. I’m probably not welcome in Brooklyn anymore… ). I subbed some sauté-steamed kale for the bulgogi and topped it all with the traditional egg. You can make this completely vegetarian or vegan and the recipe I’m sharing is of course gluten free.

Make-Shifty, Shape-Shifty Bibimbap:

Ingredients:

  • 2 portions brown rice
  • 1 bunch kale de-ribbed and chopped
  • 3 cloves garlic smashed
  • 1 cucumber sliced and then sliced in half
  • 1 big carrot julienned
  • 1 yellow onion, quartered and then quartered again (is there a name for that?)
  • 4 scallions sliced into 1/4 inch pieces
  • Sesame seeds
  • Kimchi (from a jar or homemade)
  • 4 Tbs canola oil
  • 1 Tbs sesame oil
  • 2 Tbs gluten free soy sauce
  • 1.5 – 2 cups water

For the ‘gochujang’ sauce:

A lot of gochujang sauces have gluten and msg, so if you are planning on buying pre-made instead of making this – READ the ingredients!

  • 4 Tbs sriracha sauce
  • 2 Tbs gluten-free soy sauce
  • 2 Tbs Rice vinegar
  • 1 Tbs sesame oil
  • 1-2 tsp sugar

Directions:

1. Make your sauce. This is very spicy, so if you don’t like spicy, just throw some soy sauce and a little sesame oil on your bibimbap. For those who like spicy, mix all your sauce ingredients together. Set aside.

2. Get your brown rice cooking. Timing is sort of everything in cooking, so if your brown rice takes 40 minutes to cook like mine does, I would start it when you start prepping your vegetables and sauce so that it’s done by the time you need to add it to your dish.

3. Heat 2 Tbs canola oil and 1 Tbs sesame oil in a large frying pan and sauté your garlic for a minute. Don’t let it brown as it will get bitter. Throw your kale in and pour in your soy sauce. I like to sauté the kale a bit with the garlic and then add my water. I start with a half cup of water and then add a little more. Cover the kale and let it steam until it is tender. Don’t overcook it. Keep it semi-bright green. Set aside.

4. While the kale is steaming, grab a small frying pan and heat 1 Tbs of oil. Add your onion and sauté until mostly translucent and tender.

5. Once the kale and onions are done, you can arrange all the ingredients, cucumber, carrot, kimchi, kale, onions, and brown rice in two big bowls (let the eater mix it all up, it’s pretty to present it like this). Sprinkle with scallions.

6.  In a small frying pan heat 1 Tbs of oil. Once oil is hot crack an egg into the pan. Cover the pan immediately. After about 30 seconds or so add a little water, maybe 3 Tbs. Cover again and let the egg steam. Watch it carefully, you want the white to be firm and the yolk runny as it acts as a binder and sauce for the dish.

7. Place the fried egg on top of the other ingredients and sprinkle with sesame seeds. Serve with your sauce. Mix everything together and enjoy!

8. Have a dance party!

Bonus playlist for dinner tonight:

  • Pressure Drop – Toots and the Maytals
  • Rivers of Babylon – The Melodians
  • It’s Alright – Bob Marley
  • Burial – Peter Tosh
  • Clean Up Woman – Betty Wright
  • Strongest – Etana
  • Police & Thieves – Junior Murvin
  • Rock Fort Rock – The Skatalites
  • Jah Is By My Side – Tony Rebel
  • Funeral – Bob Marley & The Wailers

.

Go Suck It: Aryuvedic Oil Pulling.

Ah the internet. I have a serious hate, love, hate relationship with the internet. Did I mention I married a techie? Yeah so… the internet and all it’s memes. Ugg. I’m tired just thinking about it. If I see one more post about ’10 things you never thought you would ever see ever if you didn’t click on this video right now of a cat batting at an egg,’ my head might explode.

Maybe it’s just me? I come from a time when computers weren’t even really a thing. Okay, no I wasn’t born in the 30’s, but when I was a kid we had encyclopedias made from paper, in order to use a dictionary you had to be able to spell, and our phones were attached to the wall – when you left home you had no means of communication unless you used a pay phone (aka ‘a glass cage of emotion’ for the Anchorman generation). We made friends face to face and played rough in nature without supervision. It was the best of times, it was… quite frankly the best of times.

But once in a blue moon something comes across one of my 20 open tabs, ahem, that’s actually helpful or fascinating or both. Considering how much we waste our brains staring at our computer screens, those little morsels of knowledge can be the ‘online age’s’ one redemption.

Would I have known about oil pulling if I didn’t have a computer? Well, maybe. I could have heard about it at a yoga studio, or read it in a magazine, or heard from a friend. But a funny thing happened instead. I read about it online a few months ago and then recently decided I wanted to try it out. Suddenly it was all over the internet. Really. Everywhere. It was as if the internet was monitoring my thoughts. Does that ever happen to you? Scary, I know.

IMG_7513

It’s quite the trend right now, this ancient Aryuvedic dental care, Gwyneth Paltrow even does it in the midst of her ‘conscious uncoupling.’ So I figured I could probably do it too since I’m not uncoupling at the moment which should give me a bit of extra free time, no? Well, whether you are coupling, uncoupling, poly, single, whatevs, you will totally benefit from this seemingly gross ritual. I know I’m winning you over already, right? I’m serious though, call the karma police because I’m about to let you in on a little secret (ok, it’s not a secret at all, but I’m going to make you want to do it & you’ll thank me later) and tell them to give me an awesome job teaching yoga to activists. Now that we’ve sorted what I want from you, I bring you: Oil Pulling 101.

“Oil pulling, also known as “kavala” or “gundusha,” is an ancient Ayurvedic dental technique that involves swishing a tablespoon of oil in your mouth on an empty stomach for 20 minutes. This action supposedly draws out toxins in your body, primarily to improve oral health but also to improve your overall health.”

Potential benefits include: 

  • Whiter teeth
  • Cavity and gingivitis prevention
  • Better breath
  • Stronger teeth and gums
  • Less jaw pain, alleviation of TMJ
  • Improved sleep
  • Alleviation of headaches
  • Alleviation of hangovers
  • Alleviation of acne and skin issues like eczema

When I first tried oil pulling, I seriously thought I would throw up. How can you not swallow for 20 minutes? Even worse, not talk?? How can you have a glob of OIL in your MOUTH for that long? And to tell you the truth, I couldn’t. I felt defeated. I barely did 5 minutes! But I learned a few things during those 5 painful minutes. The first is that it might be best to work up to the full tablespoon amount, so I continued the next few days with a teaspoon. I also cut myself some slack with the time. Now, apparently for this to really do it’s magic, you need to do the full 20 minutes, but I think your first week can be an introductory period and you can increase your time daily. I found it extremely beneficial to do something while oil pulling: cooking breakfast, showering, answering emails etc. It helps keep your mind off the oil. Also, you may need to rest for a moment and let the oil just sit there. That’s okay too. Just don’t swallow it. If it’s doing what it says, it is leaching the toxins out of your body – you really don’t want to swallow them again.

Here’s the thing though, you can’t talk. So if you have a toddler, or anyone really, that you need to communicate with right when you wake up, you’ll need assistance, sign language, or a very patient toddler (riiiight).

When I’m done, I drink my warm lemon water (Ha! I know I told you that was the first thing I do in the morning, but it’s actually the second thing). Christ. It literally takes me 25 whole minutes to get to my freaking cup of joe. But, you know what? It’s really worth it. I’ve found the discipline alone something I enjoy and need. I have noticed my teeth are whiter – just within the month. They always feel super clean, all day long. My mouth in general feels amazing. I know I’m not providing some scientific theorem here (okay, kind of), but if you’ve trusted me this far (and I know some of you have as you’ve started your lemon water rituals – yay!), then give it a shot. Remember, be patient, have discipline, and see what happens over some time. I’m pretty certain you will be surprised.

OLYMPUS DIGITAL CAMERA

Directions:

  1. Put 1 Tablespoon of extra virgin cold pressed coconut oil or cold pressed organic sesame oil into your mouth. I scoop it out as a solid and let it melt in my mouth before swishing.
  2. Swish for 20 minutes. Apparently the timing is key, as this is long enough to break through plaque and bacteria but not long enough that the body starts re-absorbing the toxins and bacteria. The oil will get thicker and milky as it mixed with saliva during this time and it should be creamy-white when spit out.
  3. Spit oil into the trash can.  Don’t spit into the sink! Do not swallow the oil as it is hopefully full of bacteria, toxins and pus that are now not in the mouth!
  4. Rinse/gargle well with warm water. Some folks suggest gargling with salt water, but that makes me gag. Your choice.

Let me know how it goes! Good luck and enjoy!

Asparagus, Mushroom, & Leek Risotto. Springtime Comfort Food at it’s Best!

IMG_7464

Today is Sunday: the day of rest. Riiiiiight. I’m not even sure it was that before the little dove, but it’s surely not now. Sundays have always been a sort of non-day for me though. There is something quite melancholy about them no? I think they are suffering a permanent identity crisis: it’s like they have one foot in the weekend and the other into the next week. You can almost feel Sunday’s awkwardness right? So what does one do with that? Can you really cut-loose on a Sunday? Or, is any celebration and joie de vivre met with a to-do list, grocery shopping, laundry, and the pre-Monday blues?

I’ve found that one way to cut through the awkwardness of a Sunday in a way that is enjoyable and productive is to have a Sunday Meditation. For me, this is cooking a big meal that we can enjoy during those first days of the week when we are still emerging from our weekend cocoons. That way, when the responsibilities of Monday hit you in the face like your toddler’s foot at 6 a.m., at least you have an amazing meal to help you emotionally eat your way through your manic Monday.

OLYMPUS DIGITAL CAMERA

I find cooking to be quite meditative, artistic, and relaxing. I mean look at these colors and textures! The rhythm of cooking can be grounding as well (unless you are the ‘Soup Nazi’ or ‘Iron Chef’ – both of which I have been dubbed by Mr. Wonderful when we cook together – Who me?). But, in all seriousness, I do find it grounding – even when it’s high paced. That’s why this is my Sunday Meditation. Maybe your Sunday Meditation is warm beer and cheesy poofs while watching re-runs of Welcome Back Kotter. Ain’t no shame! But, if you’re like me and Mondays kind of kick your butt, I would encourage this awesome ritual to help you through the week.

This risotto is nice to prepare with someone, a friend, lover, child, parole office, siri, you know whoever is hanging in your kitchen with you. Okay, the last two maybe not (especially not siri, as I refuse to participate in a relationship with an electronic voice), but it is risotto, so having an extra human hand to stir or pour in more liquid is always nice, n’est-ce pas?

You can’t really go wrong with a risotto that is embedded with fresh spring asparagus, earthy cremini mushrooms, and the subtleness of fragrant leeks. Not to mention the parmigiano reggiano. Dang! I know, I’m supposed to be dairy-free, but ohhhh parmesan…. let me count the ways. The crispness of a dry white wine adds a gentle sharp edge to the dish and the lemon zest makes everything pop just so.

Wanna impress your date or your in-laws, or hell yourself for that matter, while simultaneously making the beginning of your week easier? Make this now. It’s that yum. Enjoy!

Asparagus, Mushroom, and Leek Risotto:

Ingredients:

  • 2 Bunches fresh asparagus (ends snapped off and discarded) chopped into 1/2 inch pieces leaving heads in tact
  • 1 Leek split in half, rinsed well, and chopped
  • 2 cups sliced crimini (or your choice) mushrooms
  • 3 Tbs olive oil
  • 4 garlic cloves chopped
  • 2.5 cups arborio rice
  • 1 liter mushroom or chicken stock
  • 2 cups white wine
  • zest of 3/4 lemon
  • 3/4 cup parmigiano reggiano
  • 3.5 Tbs butter (1 of the Tbs. is for sautéing the mushrooms)
  • Salt and freshly ground pepper to taste

Directions:

1. Sauté mushrooms in butter with some salt and freshly ground pepper until tender. Set aside.

2. Sauté leeks and garlic in olive oil in large frying pan over medium high heat. Once leeks are soft, pour in your arborio rice and a little of the stock. You will slowly add stock and wine alternating both for about 25 minutes or until risotto is creamy and rice is chewy. Stir continuously.

3. Add the asparagus when there is about 7-9 minutes until the risotto is done.

4. Right before serving add in the cooked mushrooms, the lemon zest, butter, parmesan, and freshly ground pepper and stir. Et voilà!